Digital Humidity sensors are of great help in maintaining suitable environmental condition in places such as ware houses, green houses, factories, smart homes etc. They are also very easy to interface with MCU and PC. When coupled with a PC or Microcontroller they can be used in wide variety of smart automation. One such sensor I will present today is a serial humidity sensor. The interface is very simple. The communication is done over a standard asynchronous serial line. The interface parameters are as follows.
- UART 9600 bps.
- Start bit: 1
- Stop bit: 1
- Parity Bit : 0 (No parity bit)
- No Flow Control.
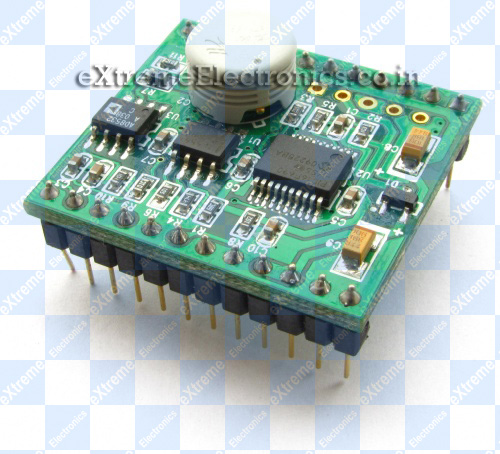 |
Fig.: Serial Humidity Sensor. |
Command Set
- All commands are begin by "$sure" followed by space (ascii 32)
- All UART Command are in ASCII
- Commands are NOT case sensitive.
- All commands ends with a CR LF pair (ascii \r\n in C language).
Get Current Temperature in Degree Centigrade
Command : $sure temp -c
Returns: XXXCentigrade
Where XXX is current temperature.
Example in C
UWriteString("$sure temp -c\r\n");
Get Current Temperature in Degree Fahrenheit
Command : $sure temp -f
Returns: XXXFahrenheit
Where XXX is current temperature.
Example in C
UWriteString("$sure temp -f\r\n");
Get Current Humidity
Command : $sure humidity
Returns: XXX%RH
Where XXX is current relative humidity.
Example in C
UWriteString("$sure humidity\r\n");
Get Current Status
Command : $sure status
Returns: Ready…
Example in C
UWriteString("$sure status\r\n");
PIN Configuration.
| PIN Number | Function | Connect to Devboard | Connect to USB/TTL Module |
| 1 | N/C | ||
| 2 | N/C | ||
| 3 | RX | TX | TX |
| 4 | TX | RX | RX |
| 5 | /CS | +5V Output (Via 4K7 Resistor) | +5v Output(Via 4K7 Resistor) |
| 6 | N/C | ||
| 7 | N/C | ||
| 8 | N/C | ||
| 9 | N/C | ||
| 10 | N/C | ||
| 11 | N/C | ||
| 12 | +5v Input | +5V Output | +5V Output |
| 13 | GND | GND | GND |
| 14 | N/C | ||
| 15 | GND | GND | GND |
| 16 | N/C | ||
| 17 | GND | GND | GND |
| 18 | N/C | ||
| 19 | GND | GND | GND |
| 20 | GND | GND | GND |
| 21 | N/C | ||
| 22 | N/C | ||
| 23 | GND | GND | GND |
| 24 | GND | GND | GND |
N/C= Not Connected.
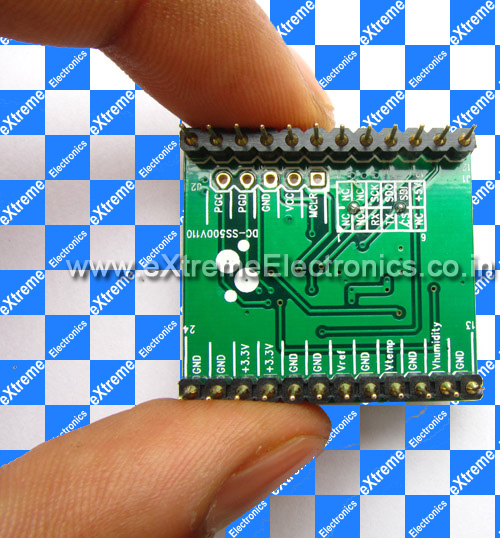 |
Fig.: Humidity Sensor PIN Configuration. |
Connection with PC for Testing.
The module can be connect to PC using tools such as CP2102 based USB to TTL Converter.
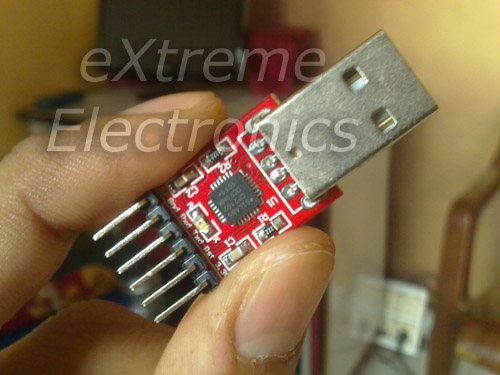 |
Fig.: USB to TTL Module. |
The driver for the CP2102 Based USB To TTL Module must be installed before connecting the module to PC. The drivers are available from here.
After connecting the USB/TTL Module to PC, find out its COM port number. The steps are outlined below.
Right Click on "My Computer" icon in Windows Desktop.
My Computer Icon on Windows Desktop |
Select "Properties"
 |
System Context Menu |
The System Properties will open up. Go to the "Hardware" Tab.
 |
System Properties. |
In Hardware tab select "Device Manager" button. It will open up device manager.
 |
Open Device Manager |
In Device Manager Find the Node "Ports (COM & LPT)"
 |
Expand the PORT node in Device Manager |
You have to find the port with following name.
- Silicon Labs CP210x if you are using CP2102 chip.
Note down the COM port number next to the port name. You need to open this Port in Realterm.
 |
COM Port Number |
Communication using a Terminal Program on PC.
If you are running Windows Vista or Windows 7 then the Hyperterminal Program may not be available. So in place of it you can use Realterm. It can be downloaded from here.
Start Realterm from its Desktop Icon. You will get a screen similar to this. Increase the Value of Row to 40 to see whole message.
|
Screenshot of Realterm |
Setup Realterm as follows. Go to the Port Tab and set it as follows.
- Baud: 9600
- Port: Port where you have connected the humidity sensor.
- Data bits: 8
- Parity: None
- Stop bits: 1
- Hardware Flow Control: None
|
Screenshot of Realterm Setup |
To send command to the Humidity Sensor Go to the "Send" tab and do as directed in the image below.
 |
Fig.: Sending Commands using RealTerm. |
You can enter the commands described above and view their output in the top blank black area of Realterm.
 |
Fig.: Humidity Sensor Connection with PC. |
Purchasing
- Buy Serial Humidity Sensor.
- Buy USB to TTL Module.
Facing problem with your embedded, electronics or robotics project? We are here to help!
Post a help request.
Avinash
Avinash Gupta is solely focused on free and high quality tutorial to make learning embedded system fun !
Follow Me:


Thankyou for this tutotial, but one thing – there is not enough information about the humidity sensor, what is the response time, max temp withstad etc. and any other more information about the sensor.
Any way wating for LCD interfacing part with microcontroller.
regards,
Uttam Dutta.
woo! this project is very complex with allot of modules, I hope to get to this level soon with your help. Thanks for the info
Hi, how many sensors can I switch in line? Can I make same for temperature sensors?