Tag Archives: display

LCD Module Interface with PIC16F877A

This article describe the hardware setup required for interfacing HD44780 based alphanumeric LCD modules with a PIC16F877A microcontroller. The software part consisting of the LCD library for PIC, its setup and use with MPLAB X IDE and XC8 compiler are described in a separate article. LCD Library for PIC – Setup on MPLAB X IDE A common controller chip used in many alphanumeric LCD module is the HD44780. The purpose of the controller is to generate pixel patterns and drive individual pixels of the LCD to show characters and symbols. In this method the main microcontroller running your application code does NOT need to generate the pixel patterns, it just need to tell the controller chip which character or symbol to show the rest is done by the controller, i.e. the HD44780. The same controller chip is used in many differently sized alphanumeric LCDs. Thus the connection schematic and driving code is same. Pin Details of LCD Module All HD44780 based LCD modules have 16 pin connecters. The detail about these pins is given below. Interface pins of LCD Module   Pin Number Pin Name Pin Type Connected with PIC16F877A’s pin 1 VSS Power Supply – 2 VCC Power Supply – 3 VEE Contrast Adjust – 4 RS Control Line RD4 5 R/W Control Line RD5 6 E Control Line […]

Displaying Custom Characters on Alphanumeric LCDs

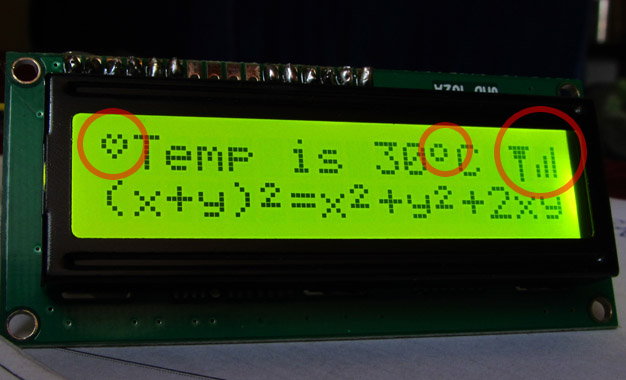
You can use this LCD Custom Char Builder Software to quickly and easily build custom characters for alphanumeric LCD modules. LCD Custom Char Maker A standard alphanumeric LCD module supports eight custom characters. So our software has view for all eight custom chars named from Char 0 to Char7. You can select any char to edit at a time. Select a char to edit … You can use your mouse to draw the character in the large green area as shown above. Holding right mouse button erases the pixel. In the example below we have drawn a "Heart" symbol for custom Char 1. Draw the char using mouse. Now we have completed drawing all the eight custom characters. Draw all 8 characters. Finally HIT Save code to get a custom_char.h file. This header file is compatible with our popular LCD interface library. You just need to copy/paste this header file in your lcd project folder. Then edit the lcd.c (part of our library) to include this file. Outputting a custom char on LCD is fairly easy! Say for example if you need to write. "I ♥ AVR" write the code like this :- LCDWriteString("I %2 AVR"); The %2 will be replaced by the custom Custom Char 2 which is defined as a heart symbol in our header file generated above. […]

LED Moving Message Display using AVR ATmega8

An interesting project that can be done using Microcontroller is a LED message scroll er. It teaches you a quite lot of things. So I decided to make one. I made the hardware design modular and cascadeble That means the whole display is made up of several 15×7 modules. Each module has everything to drive 15×7 led matrix which includes a ULN2003 row driver IC and two shift register IC to drive the 15 columns. Data is loaded serially into the 15 columns. and multiplexing is done along the row. Video Demo The 15×7 Smart LED Board. The 15×7 Smart LED Board.   Schematic. The Controller Board. Any cheap AVR MCU like a ATmega8 can be used to control this board (also up to 4 such boards which give a total of 60px by 7px display). We are using our low cost development board as the controller to the LED matrix board. This board can be purchased at a price as low as Rs. 249 including the MCU ! So wiring this project is a matter of ten minutes ! Low Cost AVR Board   Whole Setup. Connecting The Display Module with Devboard. PIN Diagram.   PIN No PIN Name Devboard PIN 1 GND GND 2 N/C   3 +5V IN +5V out 4 N/C   5 Serial Data In […]

High Power Multiplexed Seven Segment LED Display Driver

One of the most common place where small MCUs are used is to drive big seven segment displays in public area. For example the bank token number, flight or train schedule, train coach number, production volume (in factories), current forex(in banks) or gold rates etc. Since these are public display they should be big (and bright) enough to be seen from a distance of few meters. And due to their bigger size(and high brightness) they require 12V supply for each segments. Current requirement is also high. All these call for a sophisticated circuit, since these type of circuit is very common we have developed a compact board with integrated high voltage driver circuit coupled with an AVR 8 bit CPU. High Voltage Seven Segment Display Driver Board Further information, datasheet and user manual will be available as soon as the product is offered for sale. More Images

Using Multiplexed 7 Segment Displays – PIC Microcontroller Tutorial

A four digit seven segment display. The image above shows a four digit seven segment display. These type of displays are widely used to present numerical data to users. Example includes clocks, panel meters, microwave ovens, refrigerators etc. As you can see in a four digit displays there are a total of 4 x 7 = 28 segments (made of leds) so you may think that they will require lots of i/o pins of MCU. But in reality a small trick can greatly reduce the number of i/o pins required. The trick is to activate only one digit at a time. All the segments of each four digit are connected in parallel and common of each four digit is tried to MCUs i/o port via transistors. That means MCU can select any digit and put the segment data which drives the segments. Only the selected digit will light up. Then next digit is selected and segment data is changed according to the digit that must be shown in that place. Similarly each digit is selected and shown. This is done fast enough that the human I cannot see the movement. We can see all four digit lit at the same time as shown in the figure above. Multiplexed Seven Segment wiring To display any four digit number, say 1234 on […]

Interfacing Seven Segment Displays

Seven segment displays are very common for electronic product to display numerical output. Many common devices like calculators, watches, electronic weighing scales,ovens etc use them. You must have also seen lifts display the current floor numbers in seven segment displays. So in this article I will show you how to use 7-Segment displays in your own projects. Fundamentals A seven-segment display is so named because it is divided into seven different segments that can be switched on or off. The different combination of these segments switched on produces different English numbers. The display also has a decimal point.   Fig: Seven Segment Display Fig: ‘4’   The figure shows a seven segment display and the names of the various segments. For example if you want to display number 4 then segments that will be ‘on’ are {f,g,b,c} while rest are ‘off’.Basically the seven segments are just LEDs. The one common end of all the leds are connected while the rest are available. Depending on whether anode or cathode of all the leds are common they are of two types. 1) Common anode 2)Common cathode Fig: Common Cathode Type Fig: Common Anode Type PIN Configuration Now you know the basic of these displays, to use them you should know the pin configuration of the commercially available displays. As you must have […]