Tag Archives: pic

Interfacing DHT11 Humidity Sensor with PIC MCU

This article on DigitalWizard describes how you can easily interface DHT11 humidity sensor module to a PIC microcontroller. A working C program is developed to command the sensor to start measurement and then send the data to microcontroller. The data sent from the sensor is in form of a special serial format that is decoded by the MCU to get the humidity and temperature information which is finally shown in LCD. Please click here to read more.

SMS Based Wireless Home Appliance Control System using PIC MCU

This article on DigitalWizard describes how you can easily make a system that can control your home appliances like lights, fans etc from SMS commands. The project is based on PIC18F4520 MCU which is a 40 pin high performance microcontroller from Microchip Inc. It has a 16×2 LCD module as the main output unit to show various status messages to the user, thus making it extremely user friendly. GSM connectivity is achieved using a SIM300 or SIM900 modems. Please click here to read more.

USART Library for PIC – Setup on MPLAB X IDE

This article describes the setup and use of the C library for serial communication. We focus on its usage with PIC16F series of MCUs from Microchip. Here we describe how to setup a MPLAB X project with support for serial communication related functions. The library is designed for compilation and use with Microchip’s XC8 C Compiler. Fig. Serial Communication Demo   Creating a New Project in MPLAB X You can create a new project using the MPLAB’s Start page as shown below. Fig. MPLAB X Start Page Alternatively you can use menu File->New Project Fig. Select New Project from File Menu And for those who love the Keyboard over mouse can hit <Ctrl>+<Shift>+<N> Any of the three method will launch the New Project Wizard as shown below. The first step is the selection of project type. From the Categories list select Microchip Embedded and from Projects select Standalone Project. Fig. Project Type Selection Second step is the selection of device for which the project is targeted. Select Mid Range 8-bit MCUs (PIC12/16/MCP) in Family and PIC16F877A in Device. Fig. Device Selection Third step is the selection of debug tool. For that select Simulator. Fig. Tool Selection Microchip MPLAB lets you install more that one compiler. It also lets you install more that one version of the same compiler. So their […]

Serial Communication with PIC16F877A

This article series aims at teaching serial communication between a PIC microcontroller and a PC. We first introduce you with what is serial communication is and how it can used. Then we tell you how to perform serial communication using PIC microcontroller and how we use the USART peripheral for the purpose. We will tell you how our usart library for PIC16F series can be used for easy serial communication, in this part we also discuss how to set up a MPLAB X project for using the USART library. After that we will build a demo project to explore the library. Finally we will burn this demo in a PIC16F877A and establish a serial communication with PC. Serial Communication Their are several serial communication standards like RS232, SPI, I2C etc. Of which RS232 is a asynchronous method. That means it does NOT have a synchronizing clock line. One way data requires only one conductor line. Since it is a two way communication their are two lines between the two device. One for sending data called the Tx and one for receiving data called the Rx. The communication is full duplex, that means data can be sent at the same time data is being received. generally other serial communication like SPI and I2C are used for short range communication like between […]

Making A Thermometer with PIC16F877A

At basic level on microcontroller you can create this interesting project of digital thermometer. It teaches you how to acquire analog data from a sensor and display it on a lcd. We will use a popular MCU PIC16F877A to implement this mini project. The temperature will be read using a LM35 precision sensor. Final result will be shown on a 16×2 alphanumeric lcd module. Fig. PIC16F877A Based Thermometer with LCD   Stuffs Required S. No. Item Image Cost 1 40 PIN PIC Development Board Rs. 769 2 16×2 LCD Board Rs. 296 3 Single PIN Burg Wires Female/Female 20 units Rs. 100 4 12V 1A DC Adapter Rs. 127 5 LM35 Rs. 60     Total Rs. 1,352 Connections The PIC16F877A development board has the PIC16F877A microcontroller chip and its supporting basic circuitry all in a nice high quality PCB. The development board comes fully assembled and tested, thus makes it ideal for doing experiments for learning by beginners. 40 PIN PIC Development Board In the bottom portion of the pic development board you can see a row of male headers. Most of these pins are the microcontrollers general purpose input/output lines and the rest are 5v and GND supply lines. Using these pins you can connect external peripherals (like the LCD board or something else) to do your experiment. […]

LCD Library for PIC – Setup on MPLAB X IDE

This article describes the setup and use of the C library for hd44780 based alphanumeric lcd modules. This library is also available for the AVR family of microcontrollers. This part is focused on its usage with PIC16F series of MCUs from Microchip. Here we describe how to setup a MPLAB X project with support for lcd related functions. The library is designed for compilation and use with Microchip’s XC8 C Compiler. Fig. LCD Demo   Creating a New Project in MPLAB X You can create a new project using the MPLAB’s Start page as shown below. Fig. MPLAB X Start Page Alternatively you can use File->New Project Fig. Select New Project from File Menu And for those who love the Keyboard over mouse can hit <Ctrl>+<Shift>+<N> Any of the three method will launch the New Project Wizard as shown below. The first step is the selection of project type. From the Categories list select Microchip Embedded and from Projects select Standalone Project. Fig. Project Type Selection Second step is the selection of device for which the project is targeted. Select Mid Range 8-bit MCUs (PIC12/16/MCP) in Family and PIC16F877A in Device. Fig. Device Selection Third step is the selection of debug tool. For that select Simulator. Fig. Tool Selection Microchip MPLAB lets you install more that one compiler. It also […]

LCD Module Interface with PIC16F877A

This article describe the hardware setup required for interfacing HD44780 based alphanumeric LCD modules with a PIC16F877A microcontroller. The software part consisting of the LCD library for PIC, its setup and use with MPLAB X IDE and XC8 compiler are described in a separate article. LCD Library for PIC – Setup on MPLAB X IDE A common controller chip used in many alphanumeric LCD module is the HD44780. The purpose of the controller is to generate pixel patterns and drive individual pixels of the LCD to show characters and symbols. In this method the main microcontroller running your application code does NOT need to generate the pixel patterns, it just need to tell the controller chip which character or symbol to show the rest is done by the controller, i.e. the HD44780. The same controller chip is used in many differently sized alphanumeric LCDs. Thus the connection schematic and driving code is same. Pin Details of LCD Module All HD44780 based LCD modules have 16 pin connecters. The detail about these pins is given below. Interface pins of LCD Module   Pin Number Pin Name Pin Type Connected with PIC16F877A’s pin 1 VSS Power Supply – 2 VCC Power Supply – 3 VEE Contrast Adjust – 4 RS Control Line RD4 5 R/W Control Line RD5 6 E Control Line […]

DS1307 Based RTC Module

An RTC Module or a Real Time Clock Module helps a system keep track of current time (hour, minutes and seconds). It automatically increments the time without any help from the host (microcontroller). Other benefit is that it has a backup power supply from a small coin cell that help it maintain the time in absence of power. It needs very small power in backup mode so that the coin cell last for years! One such RTC IC is DS1307. It communicates with the host using I2C serial interface. We have put all the required components in one PCB to make a neat module that we can hook up to our MCUs like PIC or AVR. After the experiment you can put the module safely in your drawer, bring it out after an year and still it will give you the correct time! DS1307 Module Schematic DS1307 Based RTC Module Schematic DS1307 Module Fabricated ! DS1307 Based RTC Module   Professional DS1307 RTC module     Connection with MCU The SCL line of RTC Module will be connected to SCL line of MCU similarly the SDA line will be connected to the MCU’s SDA line. The RTC Module should be powered from the microcontroller development board. Most of our boards have extra 5v output points. Please see their documentation for […]

Thermometer with PIC Microcontroller

In the last tutorial we learn about the multiplexing technique used with seven segment displays. We learnt how it saves i/o line by using persistence of vision. Only one digit is lit at a time, but to a human eye it is too fast to catch, so we see all four digit lit the same time. In this tutorial we will make a practical use of multiplexed seven segment displays. We will use them to show current room temperature using a LM35 temperature sensor. Before reading further make sure you know the following concepts Multiplexing Seven Segment Display with PIC Micro. Using ADC of PIC Micro. Interfacing LM35 temperature sensor with PIC Micro. Schematic for PIC Thermometer Please note that this schematic is slightly different from our previous schematic on multiplexed seven segment display. The display select i/o pins were RA0,RA1,RA2,RA3 on that schematic. But in this schematic the display lines are RA1,RA2,RA3,RA4 this is because RA0 is used as analog input channel for LM35’s output. PIC Thermometer using LM35   Multiplexed Seven Segment wiring We use our PIC Development Board for making the above demo project. The PIC Development Board has all the core circuitry to sustain the MCU while the project specific part is developed on the expansion board. Multiplexed Seven Segment Display Setup   Multiplexed Seven Segment […]

Introduction to PIC Interrupts and their Handling in C

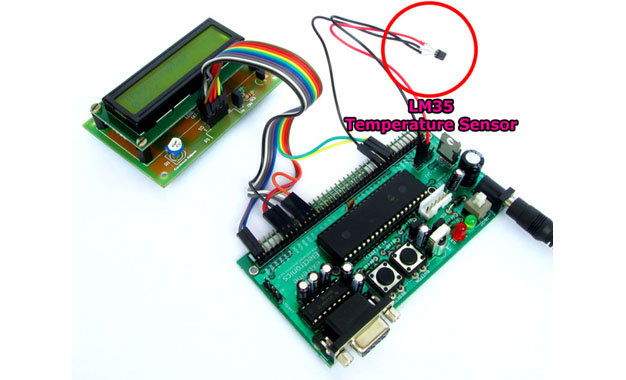
Interrupts are common features in almost all processor family, be it old 8051, AVR, PIC, ARM or the x86 used in desktops. So their in depth and clear knowledge is required for successful system software engineers. This guide will explain the interrupt system in general and their application using PIC18 architecture. We will also learn about handling of interrupts in HI-TECH C for PIC18. What are Interrupts? Interrupts, as the name suggests interrupts the normal execution and Requests and urgent attention of CPU. Interrupts are situations that the CPU can’t predict when they will happen, they can happen any time, so the CPU does not wait for them. So the CPU keeps on doing its normal job unless and interrupt occurs. For example when the USART (Serial Communication Hardware) will receive data is unknown, it can receive data any time. So the CPU keeps on doing its normal job, which may be for example read temperature using LM35 sensor and display on LCD. The CPU keeps on doing the "normal" job, but as soon as the USART receive data it informs the CPU using an interrupt. The CPU save its current state (so that it can resume), and jumps to the ISR (interrupt service routine) immediately. Where we can process the command or put it in a FIFO queue (to […]

Interfacing LM35 Temperature Sensor with PIC Microcontroller.

The are many cool sensors available now a days, ranging from IR distance sensor modules, accelerometers, humidity sensors, temperature sensors and many many more(gas sensors, alcohol sensor, motion sensors, touch screens). Many of these are analog in nature. That means they give a voltage output that varies directly (and linearly) with the sensed quantity. For example in LM35 temperature sensor, the output voltage is 10mV per degree centigrade. That means if output is 300mV then the temperature is 30 degrees. In this tutorial we will learn how to interface LM35 temperature sensor with PIC18F4520 microcontroller and display its output on the LCD module. First I recommend you to go and read the following tutorial as they are the base of this small project. Interfacing LCD Module with PIC Microcontrollers. Making the LCD Expansion Board for PIC18F4520. Using the ADC of PIC Microcontrollers. After reading the ADC tutorial given above you will note the the PIC MCU’s ADC gives us the value between 0-1023 for input voltage of 0 to 5v provided it is configured exactly as in the above tutorial. So if the reading is 0 then input is 0v, if reading is 1023 then input is 5v. So in general form if the adc read out is val then voltage is. unsigned int val; val=ADCRead(0); //Read Channel 0 voltage= […]

Using the ADC (Analog to Digital Converter) of PIC Microcontroller

Many electrical signals around us are Analog in nature. That means a quantity varies directly with some other quantity. The first quantity is mostly voltage while that second quantity can be anything like temperature, pressure, light, force or acceleration. For example in LM35 temperature sensor the output voltage varies according to the temperature, so if we could measure voltage, we can measure temperature. But most of our computer (or Microcontrollers) are digital in nature. They can only differentiate between HIGH or LOW level on input pins. For example if input is more than 2.5v it will be read as 1 and if it is below 2.5 then it will be read as 0 (in case of 5v systems). So we cannot measure voltage directly from MCUs. To solve this problem most modern MCUs have an ADC unit. ADC stands for analog to digital converter. It will convert a voltage to a number so that it can be processed by a digital systems like MCU. This enables us to easily interface all sort of analog devices with MCUs. Some really helpful example of analog devices are Light Sensors. Temperature Sensors. Accelerometers. Touch Screens. Microphone for Audio Recording. And possibly many more. In this tutorials we will learn to use the internal ADC of PIC18 devices (Example is for PIC18F4520 which is […]