Programming the Board
28 PIN AVR Development Board
Low cost development board for 28 PIN AVR microcontrollers.
Back |
Support |
Store |
Facebook |
The board can be programmed by using any Atmel compatible ISP Programmer. ISP means in-circuit programmer, in this programming method you can update the program of the built in MCU without removing it from the board. The AVR MCU always resides in the board, you just need a 10 PIN FRC Cable to connect your board with the programmer to update the firmware.
The steps below shows you how to program the board using our USB AVR Programmer.
Hardware Setup for Programming.
- Power up the board using a 12v 1A DC Supply.
- Switch on the board using the "On/Off" Switch.
- The power led should glow.
- Connect the programmer with the board using a 10 PIN FRC Cable. The programming header on board is labeled ISP.
- Connect the programmer with PC using a USB Cable.
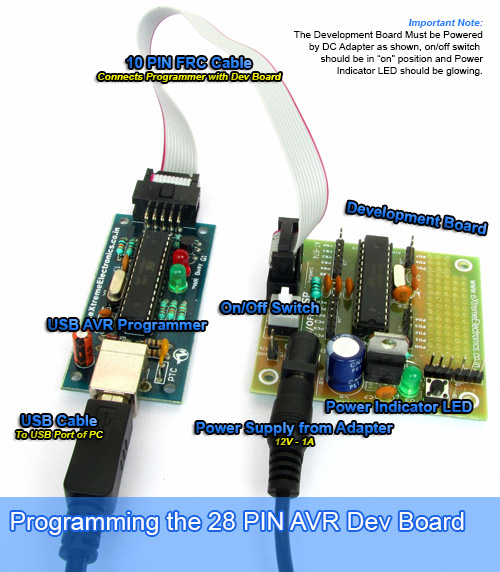 |
IMPORTANT NOTE: The development board must be powered by DC Adapter, on/off switch should be in "on" position and Power Indicator LED should be glowing. |
Software
When you first connect the AVR Programmer with your PC using USB cable, Windows will ask for drivers. Click cancel in this step. Download and install the following AVR Programmer Software, it comes with built in driver installer.
Run the setup file for installation. Please note the following points.
- USB AVR Programmer is connected via USB cable during installation.
- Installation is done using the Administrator account of Windows.
After installation you can launch eXtreme Burner - AVR from its desktop icon. The main screen looks like this.
IMPORTANT NOTE: The drivers for the programmer must be installed properly before proceeding. See this step by step guide on installing the drivers.
|
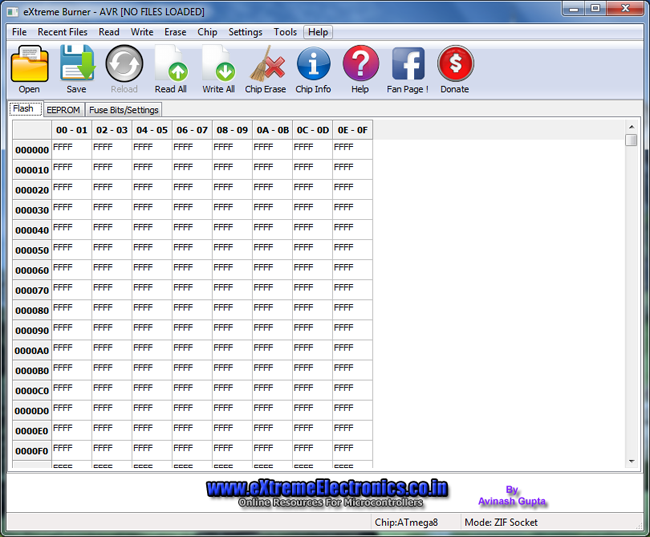 |
Fig. 2 - eXtreme Burner - AVR Main Screen. |
The first step is to select the chip which you want to program, since the software supports many other AVR chips too. This can be done by opening the chip menu. From their you can select the chip from a list of supported chips. If you are using 28 PIN AVR Development board you need to select ATmega8, ATmega168 or ATmega328 depending on the model of chip present on your board.
 |
Fig. 3 - Select the Chip's Model. |
- Click Open from the tool bar.
- Browse for the HEX file.
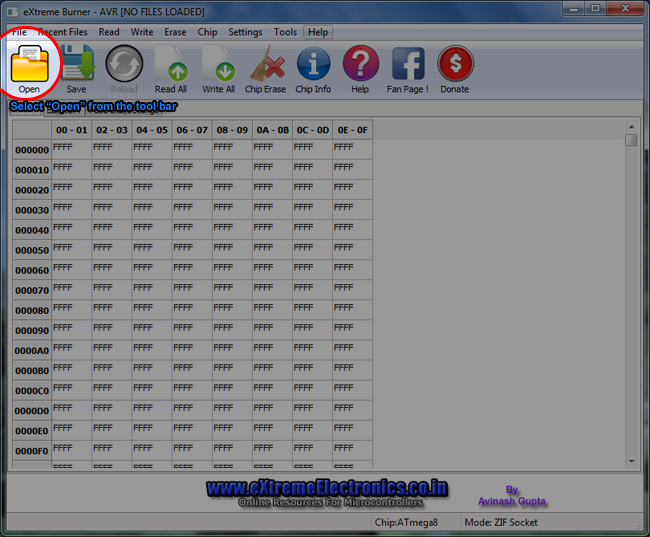 |
Fig. 4 - Select "Open" from the toolbar. |
- Click Write All from the tool bar.
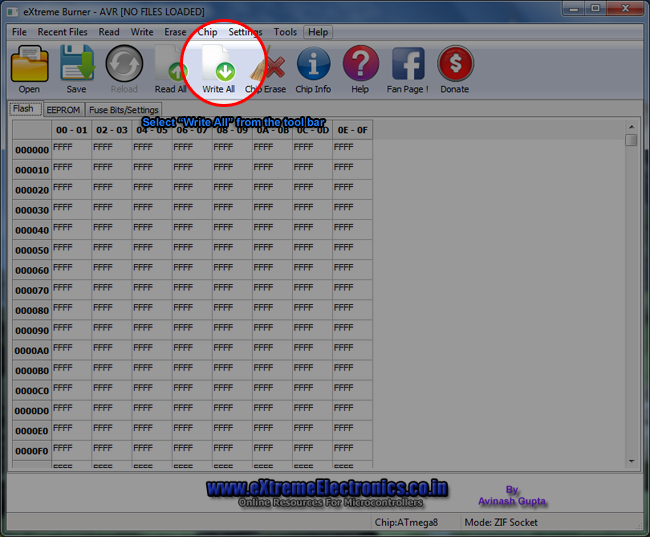 |
Fig. 5 - Select "Write All" from the toolbar. |
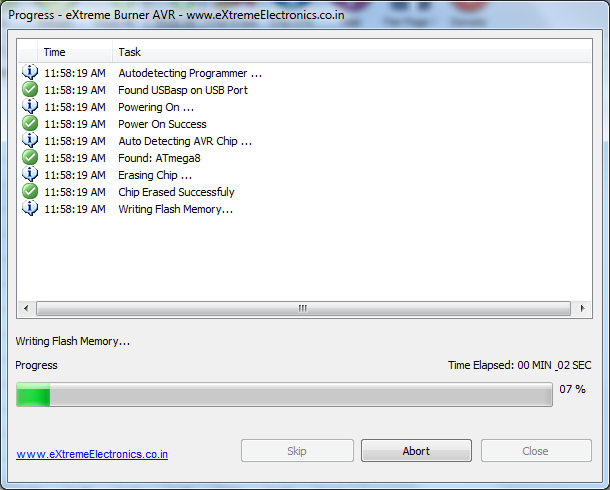 |
Fig. 6 - Writing Flash. |
 |
Fig. 7 - Task Complete. |
Back |
Support |
Store |
Facebook |