Category Archives: Microchip PIC Tutorials

Door Entry Detection for MCU Based Designs

This article discuss how you can detect the entry of a person in a room and get this signal inside your MCU. This is NOT a complete project but just an idea that can be implemented in many different projects. The technique is to use use an IR transmitter and a receiver pair. One side of door will have an IR Transmitter and the other side of door will have an IR Receiver. The transmitter (Tx in short) will continuously send IR beam to the receiver, as long as the receiver(Rx in short) will receive this beam it will give a voltage output in range of 2.5v to 3.0 volts. But as this beam is obstructed, for example by someone entering the room, the receivers output will tend towards 4.5 Fig. 1 – Schematic For Door Entry Detection The IR Transmitter can be made on a small PCB as shown below. It has four mounting holes to fix it in the wall near the door. Please use 1 Watt resistor for R2 and R3 (22ohms). Fig. 2 – IR Transmitter Module Similarly the IR receiver module is made. Fig. 3 – IR Receiver Module.   Mount the IR Transmitter and Receiver as shown in the image below. Fig. 4 – Mounting the Modules on Door. As you can see the […]

Thermometer with PIC Microcontroller

In the last tutorial we learn about the multiplexing technique used with seven segment displays. We learnt how it saves i/o line by using persistence of vision. Only one digit is lit at a time, but to a human eye it is too fast to catch, so we see all four digit lit the same time. In this tutorial we will make a practical use of multiplexed seven segment displays. We will use them to show current room temperature using a LM35 temperature sensor. Before reading further make sure you know the following concepts Multiplexing Seven Segment Display with PIC Micro. Using ADC of PIC Micro. Interfacing LM35 temperature sensor with PIC Micro. Schematic for PIC Thermometer Please note that this schematic is slightly different from our previous schematic on multiplexed seven segment display. The display select i/o pins were RA0,RA1,RA2,RA3 on that schematic. But in this schematic the display lines are RA1,RA2,RA3,RA4 this is because RA0 is used as analog input channel for LM35’s output. PIC Thermometer using LM35   Multiplexed Seven Segment wiring We use our PIC Development Board for making the above demo project. The PIC Development Board has all the core circuitry to sustain the MCU while the project specific part is developed on the expansion board. Multiplexed Seven Segment Display Setup   Multiplexed Seven Segment […]

Using Multiplexed 7 Segment Displays – PIC Microcontroller Tutorial

A four digit seven segment display. The image above shows a four digit seven segment display. These type of displays are widely used to present numerical data to users. Example includes clocks, panel meters, microwave ovens, refrigerators etc. As you can see in a four digit displays there are a total of 4 x 7 = 28 segments (made of leds) so you may think that they will require lots of i/o pins of MCU. But in reality a small trick can greatly reduce the number of i/o pins required. The trick is to activate only one digit at a time. All the segments of each four digit are connected in parallel and common of each four digit is tried to MCUs i/o port via transistors. That means MCU can select any digit and put the segment data which drives the segments. Only the selected digit will light up. Then next digit is selected and segment data is changed according to the digit that must be shown in that place. Similarly each digit is selected and shown. This is done fast enough that the human I cannot see the movement. We can see all four digit lit at the same time as shown in the figure above. Multiplexed Seven Segment wiring To display any four digit number, say 1234 on […]

Introduction to PIC Interrupts and their Handling in C

Interrupts are common features in almost all processor family, be it old 8051, AVR, PIC, ARM or the x86 used in desktops. So their in depth and clear knowledge is required for successful system software engineers. This guide will explain the interrupt system in general and their application using PIC18 architecture. We will also learn about handling of interrupts in HI-TECH C for PIC18. What are Interrupts? Interrupts, as the name suggests interrupts the normal execution and Requests and urgent attention of CPU. Interrupts are situations that the CPU can’t predict when they will happen, they can happen any time, so the CPU does not wait for them. So the CPU keeps on doing its normal job unless and interrupt occurs. For example when the USART (Serial Communication Hardware) will receive data is unknown, it can receive data any time. So the CPU keeps on doing its normal job, which may be for example read temperature using LM35 sensor and display on LCD. The CPU keeps on doing the "normal" job, but as soon as the USART receive data it informs the CPU using an interrupt. The CPU save its current state (so that it can resume), and jumps to the ISR (interrupt service routine) immediately. Where we can process the command or put it in a FIFO queue (to […]

Interfacing LM35 Temperature Sensor with PIC Microcontroller.

The are many cool sensors available now a days, ranging from IR distance sensor modules, accelerometers, humidity sensors, temperature sensors and many many more(gas sensors, alcohol sensor, motion sensors, touch screens). Many of these are analog in nature. That means they give a voltage output that varies directly (and linearly) with the sensed quantity. For example in LM35 temperature sensor, the output voltage is 10mV per degree centigrade. That means if output is 300mV then the temperature is 30 degrees. In this tutorial we will learn how to interface LM35 temperature sensor with PIC18F4520 microcontroller and display its output on the LCD module. First I recommend you to go and read the following tutorial as they are the base of this small project. Interfacing LCD Module with PIC Microcontrollers. Making the LCD Expansion Board for PIC18F4520. Using the ADC of PIC Microcontrollers. After reading the ADC tutorial given above you will note the the PIC MCU’s ADC gives us the value between 0-1023 for input voltage of 0 to 5v provided it is configured exactly as in the above tutorial. So if the reading is 0 then input is 0v, if reading is 1023 then input is 5v. So in general form if the adc read out is val then voltage is. unsigned int val; val=ADCRead(0); //Read Channel 0 voltage= […]

Using the ADC (Analog to Digital Converter) of PIC Microcontroller

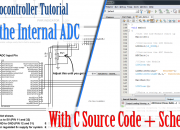
Many electrical signals around us are Analog in nature. That means a quantity varies directly with some other quantity. The first quantity is mostly voltage while that second quantity can be anything like temperature, pressure, light, force or acceleration. For example in LM35 temperature sensor the output voltage varies according to the temperature, so if we could measure voltage, we can measure temperature. But most of our computer (or Microcontrollers) are digital in nature. They can only differentiate between HIGH or LOW level on input pins. For example if input is more than 2.5v it will be read as 1 and if it is below 2.5 then it will be read as 0 (in case of 5v systems). So we cannot measure voltage directly from MCUs. To solve this problem most modern MCUs have an ADC unit. ADC stands for analog to digital converter. It will convert a voltage to a number so that it can be processed by a digital systems like MCU. This enables us to easily interface all sort of analog devices with MCUs. Some really helpful example of analog devices are Light Sensors. Temperature Sensors. Accelerometers. Touch Screens. Microphone for Audio Recording. And possibly many more. In this tutorials we will learn to use the internal ADC of PIC18 devices (Example is for PIC18F4520 which is […]

Making “The LCD Expansion Board” for PIC18F4520

In this tutorial I you show you how to make a very useful expansion board for our PIC development board. It will be a Do It Your self (DIY) LCD Expansion board. The expansion board can be plugged into the PIC development board to add 16×2 Alphanumeric LCD Support to it. Since LCDs are required in many projects and experiments it will be a very helpful board. I recommend you to read the LCD Interfacing Tutorial before you proceed. It will give you an Idea how LCD is connected to PIC Microcontrollers. So lets start! Schematic for LCD Expansion Board. Fig.: LCD Module Interface with PIC Microcontroller. The board is very easy to make as the MCU core unit is already done for you. So you need to just care about the LCD part. It consists of the 16×2 LCD Module and A variable resistor (10K) only! Optionally you can add a 47ohm series resistor with the LED backlight of the LCD Module, to enable the backlight. The variable resistor is used to adjust the contrast of the module. If NO text is displayed adjust this pot. All I/O ports and power supply is available at the top of expansion board. Fig.: A blank expansion. As you can see the top row in the board lists all I/O port of […]

Introduction to PIC18’s Timers – PIC Microcontroller Tutorial

Timers are common features of most microcontroller. In simplified terms a timer is just a register whose value keeps increasing (or decreasing) by a constant rate without the help of the CPU. The CPU can read or write this register any time. It reads it find out how much time has elapsed. The Timer register can have the following bit length 8 bit timers – These can count between between 0-255 16 bit timers – These can count between 0-65536 32 bit timers – These can count between 0-4294967296 A timer has a clock source, for example of the clock source of 10KHz is input to a timer then one increment will take 100uS (micro second). This clock source can be obtained from the CPU clock. The CPU clock of popular MCU ranges from 1 MHz to 20Mhz, this can be sometimes too fast. To help us out their is a thing called prescaler in the MCU. The job of prescaler is to divide the CPU clock to obtain a smaller frequency. The PIC Micro that we will use in this example has the following prescaler division factors available. 256 128 64 32 16 8 4 2 1 (Prescaler by-passed) Timers are also called Counters this is because they can be used to count external events. The following example illustrate […]

RS232 Communication using PIC18F4520’s USART – PIC Microcontroller Tutorial

Hello Friends! In this tutorial I will discuss how to practically do a simple communication over RS232 interface. For those who are completely new to this I clarify that the motive is to send and receive data between two device using a standard called RS232. RS232 is serial interface that means that data is transferred BIT by BIT at a time. Since data is transferred BIT by BIT so we need only a single wire two send data and an another one to receive data. One more common wire (called GND) is required between two separate circuit to enable current flow. So a total of three wire are required for communication. RS232 can be used to communicate between a variety of devices. Like your MCU and a GSM module or a PC. In this tutorial we will demonstrate a link between a PIC18F4520 MCU and a standard PC. On PC we will run a terminal program like RealTerm or Hyperterminal. A terminal program is used to send and receive text data. So any text send by the MCU will be visible on Terminal Screen and Any keypress you make on the PC keyboard will be send over RS232 to your MCU. This configuration is the simplest setup to test and understand RS232 communication. When you have enough knowledge you can […]

Interfacing LCD Modules with PIC Microcontrollers.

A large number of embedded project require some type of user interface. This includes displaying numerical, textual and graphical data to user. For very simple numerical display we can use 7 segment displays. If the requirement is little more than that, like displaying some alphanumeric text, we can use LCD Modules. They are cheap enough to be used in low cost projects. They come in various sizes for different requirement. A very popular one is 16×2 model. It can display 2 lines of 16 characters. Other models are 16×4,20×4, 8×1,8×2 etc. In this tutorial we will learn how we can use such modules with Microchip PIC Microcontrollers. Here I will present my LCD library which you can use to create LCD based application/projects quickly. For demo I will use PIC18F4520 Microcontroller but you can use any PIC18 MCU. But you have to calculate the CONFIG values for correct setting and CPU clock selection etc. That means the chip should be configured correctly. See datasheet for more info on CONFIG bytes. MPLAB Project Creation First create a MPLAB project as described in this tutorial. Name the project LCD. Also add a main file called "lcd_test.c". To use my LCD library you need to add it to your project. Just copy/paste the following files to your project folder. Header Files lcd.h myutils.h […]

Programming in C – Tips for Embedded Development.

Here I will highlight some features of C language commonly used in 8 bit embedded platforms like 8051, AVR and PICs. While programming microcontrollers in C most of the time we have to deal with registers. Most common tasks are setting and clearing bits in a register and check whether a bit is 0 or 1 in a given register. So here I will give detail on those topics, it will help you if you are new to embedded programming in C and if you get confused when you see some codes. A Register A register is simply a collection of some bits (mostly 8 bits in case of 8bit MCUs). Either each different bit in a register has some purpose or the register as a whole holds a value. Registers serves as connection between a CPU and a Peripheral device (like ADC or TIMER). By modifying the register the CPU is actually instructing the PERIPHERAL to do something or it is configuring it in some way. And by reading a register, the CPU can know the state of peripheral or read associated data. Fig.: CPU writing to Peripheral Register   Fig.: CPU Reading from Peripheral Register Binary Numbers in C When you write a=110; in C it means you are setting the value of variable"a" to "one hundred and […]

General Purpose Digital IO with PIC Microcontrollers.

GPIO( General Purpose IO) is the most basic method of communication between MCU and external world. These are done with what is called a PORT. Ports are nothing but a set of bits physically connected to PINs of Microcontroller and available outside the chip. As we are working on PIC micros and they are 8 bits so the maximum size of a PORT is 8 bits. Some PORTs have fewer than 8 bits. You can turn each bit in a PORT on and off under program control. The bits which you set as 1 becomes HIGH and the physical PIN of Micro is at Vcc(supply voltage, usually 3.3v or 5v). And the PINs which you clear (=0) becomes low and physical level is 0v(GND). Fig.: PIC IO Port example, PORTB.   Fig.: PIC IO Port example, Using PORTB, Turning BITs on and off. You can test the operation of an IO port by using LEDs as shown below. Fig.: When the bit is set to 0 the LED remains off. When you write a value 1 to corresponding bit the LED starts glowing. Fig.: When the bit is set to 1 the LED starts glowing. PORTs are Named like PORTA,PORTB,PORTC etc. The PIC we are using PIC4550 has the following PORTs PORTA(8bit wide) PORTB(8bit wide) PORTC(7bit wide) PORTD(8bit wide) PORTE(4bit […]