Tag Archives: AVR

Creating Your First Embedded Project in Atmel Studio

In the last chapter we learned about the development process of embedded systems. We saw what hardware and software tools are required to work with Atmel AVR microcontrollers. We learned about programming languages, compilers and IDEs. In this chapter we will go in the step by step details of using the Atmel Studio IDE to enter and compile a program written in C language. We won ‘t be going in the details of the program. That means what each line means and does. We will simply copy/paste a program as our intention in this chapter is to get familiar with the IDE only. Program will be discussed in latter chapters. You can start Atmel Studio 6 by using its icon from the Windows® Desktop or the Start Menu. Atmel Studio 6 Startup Screen The First screen shown up after the AS5 has started is the Start Page. The start page helps you quickly create a new project or load your previous project without wasting much time. Atmel Studio 6 Home Screen To create a new project we select New Project … option from the Start Page. AS6 will show you the New Project Wizard as shown in the above image. From the project template area (Installed Templates) select C/C++ as the project template. From the project type area select “C […]

Development Process of Embedded Systems

Come on, let’s see how an idea in your brain can be transformed to a working embedded systems. What are the key steps you would be following each type you design a system. The key characteristic of embedded system is that it inherits much of its functionality from a well designed program. Everything the embedded system is able to do is through a program which is running inside the microcontroller. This program is a special type of "software" called a firmware. Because it is "firm" in nature because the embedded system once programed and deployed to the end user will be running the same program through out its life time. For example a TV remote control runs the same program which encodes key press data into serial bit stream and sends through an IR transmitter. Same is the case with a MCU inside a pen drive, digital watch and calculators. In contrast a "software" like MS Word or Firefox is not that much "firmly" tied to your PC or Phone. Your PC can run several other software in addition to these and also they can be replaced by their alternatives. So development of embedded software (i.e. firmware) and its installation on microcontroller should be clear to the user. Step I – Development of Program A program is a step by […]

Simple Single Motor Control using AVR ATmega16

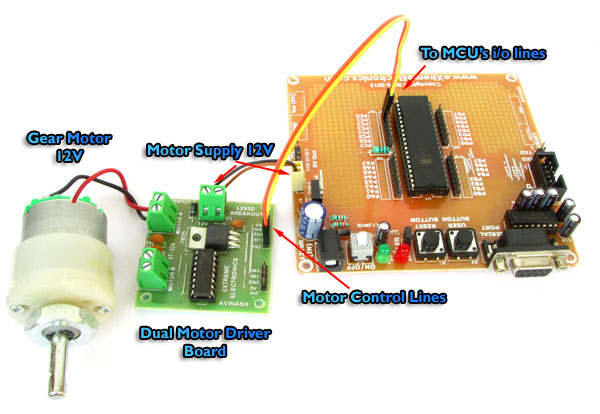
Microcontrollers are good when it comes to brain, but to do anything in real world they need muscles too ! Their muscles are electromechanical actuators like motors. Their are several types of motor available to do various type of motion. The simplest of them are DC motors. They can generate rotary motion and when wheels are attached to their shaft they can be used to move a body. Applications include motion of a robot on flat surface like a floor. Normally a DC motors runs at a high RPM, so to slow it down a gear head is attached in front of it. This makes RPM come down to values such as 50 RPM to 500 RPM. This also increase the torque online casino no deposit generated by the motor. The image below shows a 12v DC Gear Motor. The front black portion contains the gear assembly. Fig. A DC Gear Motor In this tutorial we will learn the basics about these motors and how to control them using a microcontroller. DC Motor Rotates in one direction when you apply power to its terminals. When you reverse the polarity of the supply it will rotate in opposite direction. Since a DC Motor requires current in the range of 400ma to 1000ma we cannot supply them directly from the MCUs I/O […]

Microwave Controller using ATmega8 – AVR Project

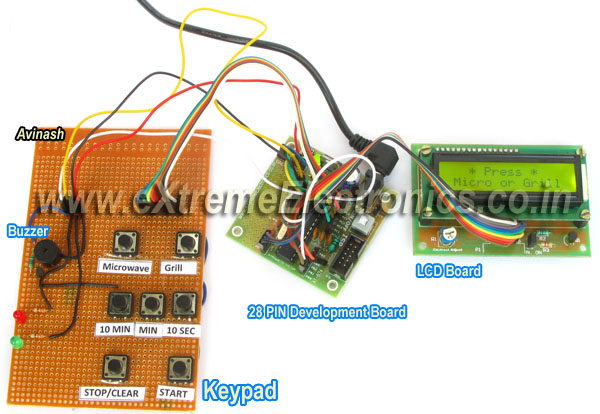
Microwave Controller’s User Interface Fig. Microwave Timer using AVR ATmega8   The user interface has the following parts. Output Device: A 16×2 alphanumeric LCD Module is used as the main output device. It can display numbers, alphabets and few symbols. It can show two line and each line can have 16 characters. The backlight enables the text to be visible even in dark. A buzzer beeps when the system receive input from the user and the input is successfully processed. For example if the user presses 10 MIN button to increment timer by 10 min and this is successfully carried out the buzzer beeps. But if the timer is already at the maximum setting (90 minutes) the operation could be carried out, so the buzzer does not beeps. This buzzer also beeps a few time when the food is ready (countdown is finished) Input Device: Input from user is received by a keypad which has seven push buttons. The details of button is given below. Button Function Microwave Selects Microwave mode. Grill Selects Grill mode. 10 MIN Increment timer by 10 minutes. MIN Increment timer by 1 minute. 10 SEC Increment timer by 1 sec. STOP/Clear If the microwave is in on condition, this button turns it off and pauses the timer count down. If you are setting the timer, […]

Comparing Low Cost AVR Dev Boards

Over the years I have seen people just open up the mouth without thinking. This is more common in the young age group like those of students. Often this also miss leads others. Recently we posted and ad on Facebook for our low cost development board which was priced at Rs. 299. Some guy without thinking a minute, compared it with a even lower cost product from some other vendor. What my point is that those two products are NOT similar ! Their are HUGE differences ! So I thought I should make out those differences stand out. Power Supply Our Board Probots’ Board Has built in 12V to 5V regulator circuit built using 7805 IC. No regulator. Advantage   You can power up the board using an adapter of any voltage output between 9v to 18v Using higher voltage adapter has the advantage that power from it can be used to driver higher voltage devices like relays or motors. You can power up using a 5v adapter only! If you need 12v supply to power relays or motors you need a separate adapter or battery.   Power Switch Our Board Probots’ Board Has an on/off switch No on/off switch Advantage   Easy power control. Frustration on long run.   Prototyping Area Our Board Probots’ Board Has large prototyping area […]

Remote Temperature Monitoring using GSM – AVR Project

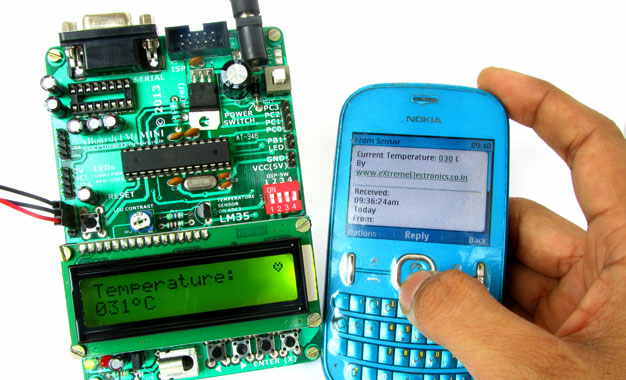
If you want a live demo of this, please register from the link given below. (Only in Pune) REGISTER NOW! This project can also be implemented using a PIC18F4520 microcontroller. Temperature monitoring have wide application in daily life. In modern day keeping an eye on temperature of places such as server rooms, hospital rooms, warehouses and green houses can help solve many problems. But with the use of normal temperature sensors, someone needs to go to the place in order to view the temperature. But with the development of GSM network, one can easily connect the sensor with GSM network, so that you don’t need to be present near the sensor in order to view the temperature. You can just pick up your cell phone and send a request to your sensor by a text message and in no time you will receive the temperature of the remote place ! The advantage is the you don’t need any kind of "special" device at the receiver end. You can use any cell phone to view the remote temperature. This reduces cost as you already have a cell phone. Other benefit is that the range is not limited. You can be at any place in the world (with mobile coverage of course!), to request temperature data from your room. Fig. SMS Based […]

Introduction to AVR Microcontrollers

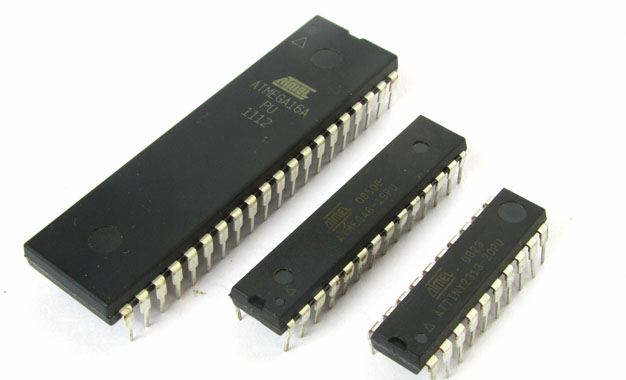
Just what is a microcontroller? To get you understand quickly I define a microcontroller as a single chip computer. Yes it is a full blown computer in its own. It has a C.P.U., RAM, some amount of EEPROM (for secondary storage i.e. permanent storage without power), many on-chip peripherals(Timer,Serial communication, Analogue to Digital converters etc.). If you don’t understand, no problem I will be dealing them in detail in next tutorials. But compared to a P.C. their resources(RAM,speed etc)are less. But that is what is required ! Because P.C. is a general purpose computer, which means it can run thousands of different software that are available for specific needs. Like it can run a game. The same P.C. can run this browser in which you are reading this! It can run a custom solution for banks,railways and airways. It can run a 3D modeling, video editing & image editing software for a production company. Many of these are huge software,requiring lots of memory and CPU power. And a P.C. can run simultaneously many of these ! So to run them the host computer should have enough RAM and CPU power so that it can run heaviest of them. But in case of a microcontroller(aka MCU) which is used for a specific purpose like switching a Microwave oven heating off after […]

AVR UBRR Calculator for Android

If you have worked with AVR’s USART you must be knowing that the first step is to figure out the value of UBRR (USART Baud Rate Register) the formula is given in the datasheet. So every time you need a new baud rate or you change the clock speed of MCU, you need to recalculate the new UBRR! This includes finding the datasheet, opening it and then finding the page in which the formula is given! Then you need to search for your scientific calculator (well in my case I don’t like Windows calculator much !) and do the calculations only to find out that the error is too high! And the baud rate cannot be implemented! So you go over again and select new baud rate which is near to the required one, and repeat the calculation process. To save all this trouble I have made a small Android app to get all this job done with out the datasheet or the calculator ! And believe me finding a scientific calculator in your desk is way tougher than finding your cell phone 🙂 Features Runs on Smart Phones/Tablets powered by Android 2.2 or higher. Supports calculations for Normal, Double Speed and Asynchronous modes of USART. Displays result in both HEX and Decimal Formats. Displays error rate in transmission/reception for […]

Interfacing TCS3200 Colour Sensor with AVR ATmega32

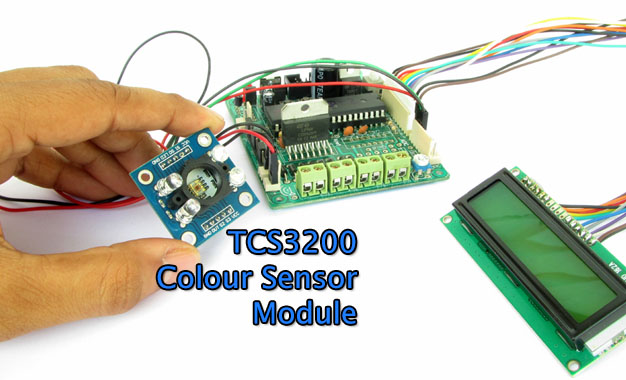
Detecting colour of an object can be an interesting and useful electronic application. It can be realized using a colour sensor like TCS3200 and a general purpose microcontroller like AVR ATmega32. TCS3200 Colour Light to Frequency Converter Chip Fig. TCS3200 Chip .   TCS3200 chip is designed to detect the colour of light incident on it. It has an array of photodiode (a matrix of 8×8, so a total 64 sensors). These photodiodes are covered with three type of filters. Sixteen sensor have RED filter over them thus can measure only the component of red in the incident light. Like wise other sixteen have GREEN filter and sixteen have BLUE filter. As you should know that any visible colour can be broken into three primary colours. So these three type of filtered sensors helps measure the weightage of each of primary colours in incident light. The rest 16 sensors have clear filter. TCS3200 converts the intensity of incident radiation into frequency. The output waveform is a 50% duty cycle square wave. You can use the timer of a MCU to measure period of pulse and thus get the frequency. The output of TCS3200 is available in single line. So you would ask how we get the intensity of RED,GREEN, BLUE and CLEAR channels? Well it has two inputs S2 and […]

SMS Based Voting System – AVR GSM Project

If you want a live demo of this, please register from the link given below. (Only in Pune) REGISTER NOW! This project can also be implemented using a PIC18F4520 microcontroller. Hi friends ! Here I am showing a microcontroller based project called the "GSM Based Voting System". Using this system you can ask your users to vote for any of the four options. Four available options are identified by a letters ‘A’, ‘B’, ‘C’ and ‘D’. User can vote for any option by sending a text message to the mobile number. For example if you want to create a poll like this. Which is your favorite phone brand? A: Nokia B: Apple C: Samsung D: L.G. So your user can vote for any of the four brands by sending a message like this VOTE x where x is the choice he/she wish to vote for. For example if they want to vote for Nokia, then they should send a message like this : VOTE A The number of vote received for each option is shown in real time on the LCD Module. The votes are stored in the internal EEPROM of the AVR so they are not lost on power failures. That means even if you switch off the device and switch it on after few days (or few years!) […]

Sending and Receiving SMS using SIM300 GSM Module

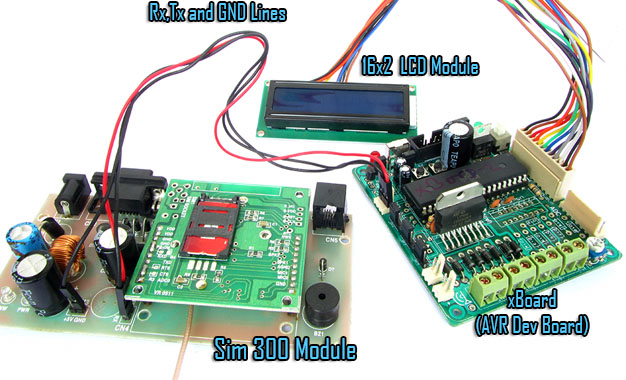
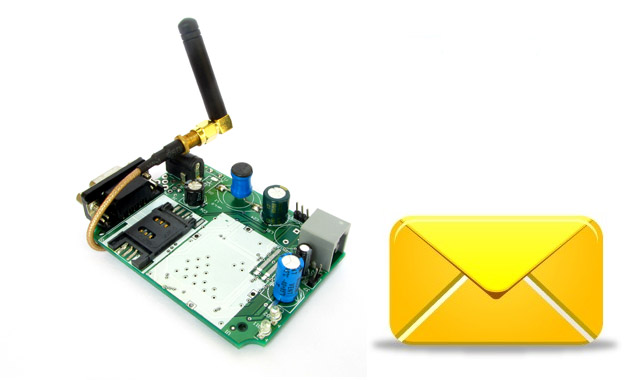
If you want a live demo of this, please register from the link given below. (Only in Pune) REGISTER NOW! This project can also be implemented using a PIC18F4520 microcontroller. We have schematic and C library available. Hi friends in this part we will have a look at the functions related to text messages. By the end of this article you will have a clear idea of how to wait for a text message, read the message, send a new text message and deleted a received message. We have already discussed the basics of SIM300 GSM Module interface with AVR MCU in our previous tutorial you can refer that article to know about the schematic and basic communication code. GSM Module SIM300 Interface with AVR After reading the above article you will know how we have connected the SIM300, AVR ATmega32 and LCD Module to make a basic test rig. Also covered in the article is the detail about the communication method between SIM300 and AVR which is called asynchronous serial communication, done using AVR’s USART peripheral. The article shows you how to use the AVR USART library to send and receive data to/from the GSM Module. We have also discussed the command response method used for the interfacing with the module. Working code is provided that shows you how […]

Line Following Robot using AVR ATmega8

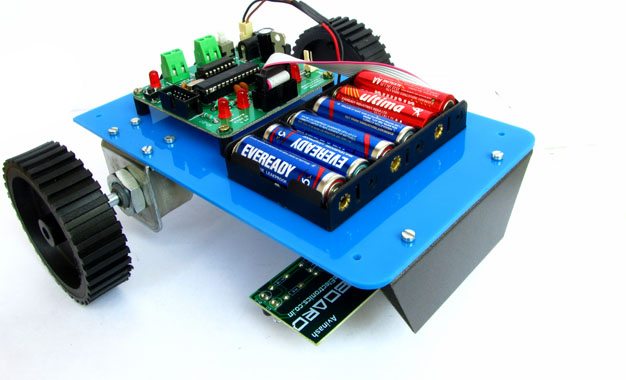
One of the most basic autonomous robot you can build is a line following robot(LFR). This type of robot is run over a white surface which has an arbitrary path drawn over it by using back paint. The task of the robot is to run exactly along this painted path. You may note that the surface may also be black(or any other dark colour), in that case the path is a light colour like white. Please watch the following video for a LFR in action. Designing an LFR At minimum our LFR design require the following components. A sensor to detect the line on the surface.(It can be a simple IR Reflectance Sensor or an high end camera!). We will use a simple IR based sensor, it is cheap and easy to build and use. This article describe how to make a line sensor array. A microprocessor to run the code that takes inputs from the sensor and control the motion of robot. We will use a cheap single chip computer called an microcontroller (MCU). A popular family of microcontroller is AVR series from Atmel. A member of the popular family is ATmega8. ATmega8 is chosen because it has just the required amount of resources and is very low cost. The MCU cannot drive the motors (used to actually make […]