Tag Archives: RealTerm

PIC16F877A Serial Communication Demo

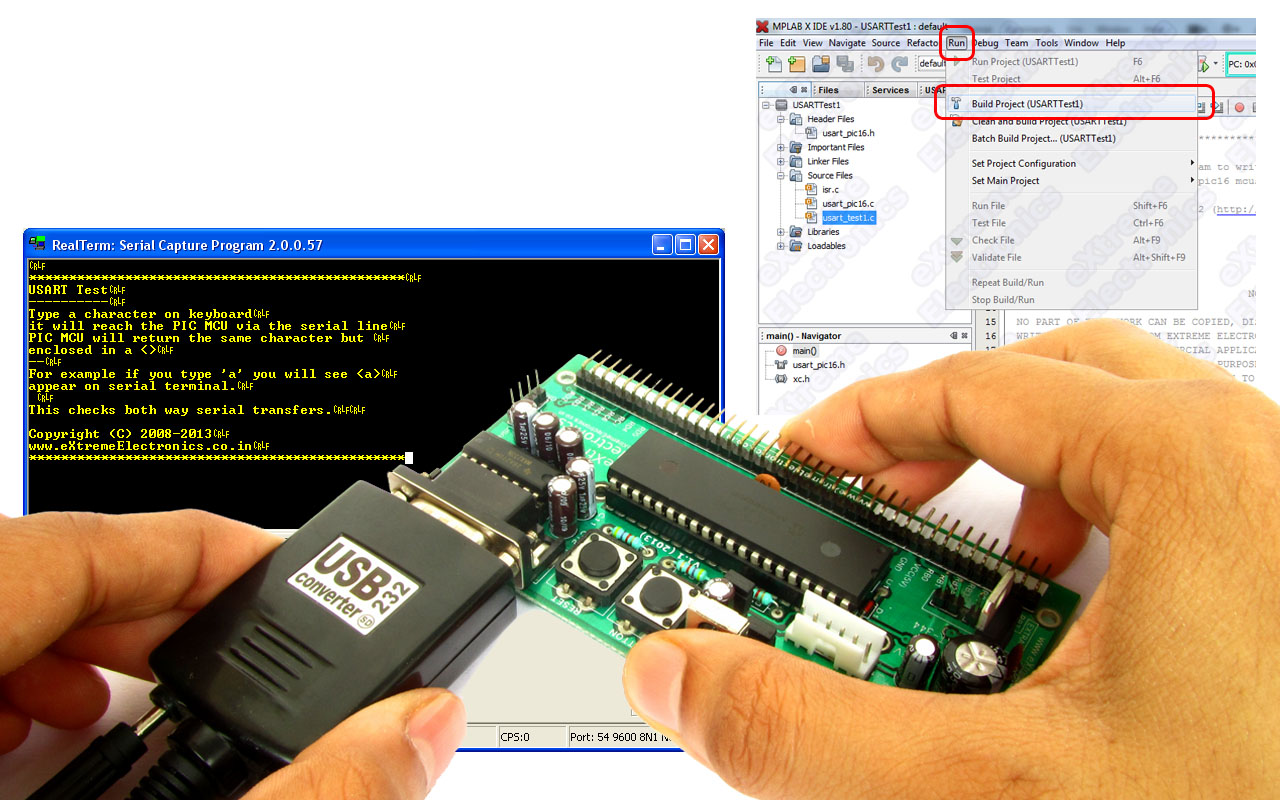
In the last two tutorial we discussed how to make the hardware for serial communication and how to setup a MPLABX Project with support for serial communication functions. Then we complied a demo program to use those serial communication functions and burnt the final hex file to our PIC16F877A development board. Now its time for us to run this demo. Setting up hardware for PIC Serial Communication USART Library for PIC – Setup on MPLAB X IDE To interact with this demo running on your PIC development board. You need a terminal program. A terminal program is a utility tool running on PC that helps you view text data coming from the serial port and also send data to the port. This is handy for initial development of connected hardwares. We use Real Term for this purpose. You can download it from here. Download Real Term. RealTerm The top black area show the character data as they are received by the serial port. The received characters are shown in YELLOW coloured text. The bottom area has lots of tab on it. The Port tab (shown above) is used to configure the serial port. Configure the port exactly as show in the image above. Baud = 9600 Port = <the serial port number where you have connect the PIC development board> […]

PC Controlled Robot

In this tutorial we will discuss a simple PC controlled robot. The Robot PC link will be a RS232 serial line. The robot will have only five commands. Move forward (RS232 char ‘F’ or ‘f’) Move backward (RS232 char ‘B’ or ‘b’) Turn Left (RS232 char ‘L’ or ‘l’) Turn Right (RS232 char ‘R’ or ‘r’) Stop (RS232 char ‘S’ or ‘s’) To keep things as simple as possible, in this example we will use terminal software RealTerm for sending commands to the robot. Later on a dedicated software can be written on PC end to control the robot. The Robot’s Hardware The robot’s hardware will be a simple differential drive using two 200RPM DC Gear motor mounted on a HQ Metal Chassis with a front castor wheel. On the back motors we have mounted plastic wheels. More about differential drive is explained in this tutorial. Gear Motors   Wheels   Metal Chassis   Remove motor’s nut   Insert the motor   Fasten the nuts again   Both motors installed   Front Castor wheel   Installing the front castor   Mounting hole for wheels screw   Mounting the wheels   Chassis is ready! The Electronics The robot is controlled using xBoard v2.0 which has ATmega32 as main CPU and integrated motor drivers. We have connected xBoard v2.0 with PC using […]

Digital Humidity Sensor

Digital Humidity sensors are of great help in maintaining suitable environmental condition in places such as ware houses, green houses, factories, smart homes etc. They are also very easy to interface with MCU and PC. When coupled with a PC or Microcontroller they can be used in wide variety of smart automation. One such sensor I will present today is a serial humidity sensor. The interface is very simple. The communication is done over a standard asynchronous serial line. The interface parameters are as follows. UART 9600 bps. Start bit: 1 Stop bit: 1 Parity Bit : 0 (No parity bit) No Flow Control. Fig.: Serial Humidity Sensor.   Command Set All commands are begin by "$sure" followed by space (ascii 32) All UART Command are in ASCII Commands are NOT case sensitive. All commands ends with a CR LF pair (ascii \r\n in C language). Get Current Temperature in Degree Centigrade Command : $sure temp -c Returns: XXXCentigrade Where XXX is current temperature. Example in C UWriteString("$sure temp -c\r\n"); Get Current Temperature in Degree Fahrenheit Command : $sure temp -f Returns: XXXFahrenheit Where XXX is current temperature. Example in C UWriteString("$sure temp -f\r\n"); Get Current Humidity Command : $sure humidity Returns: XXX%RH Where XXX is current relative humidity. Example in C UWriteString("$sure humidity\r\n"); Get Current Status Command : $sure […]

Getting Started with Serial RFID Reader

This pictorial step by step guide you show you how you can connect a serial RFID Reader to your PC using USB Port. Before you begin please read the following tutorial on RFID Technology and its application to make yourself familiar with it. Interfacing RFID Reader with AVR Also you will need the following modules, they can be purchased from our online store. Fig.: Serial RFID Reader.   Fig.: USB to TTL Converter.   Fig.: RFID Tags (Comes with the Reader). The RFID Reader is used to read the tags. The tags can be used to identify peoples. For example in a electronic door lock, the user just need to bring a tag (which can be a card or keychain) near the antenna. The system identify the user and present a welcome message (like "Welcome Mr. Steve"), then it prompts for password. Its like your ATM card but the advantage is that you don’t need to bring it out from your wallet. Just touch the wallet to the antenna, and that’s it! The USB to TTL Module is used to connect the RFID reader to PC. Connect the RFID reader to USB/TTL Converter as show in in the image below. Fig.: Connections. The connection is simple. All the PIN names are written on the PCBs itself so no confusion while […]