Tag Archives: xBoard

Interfacing MMA7455 I2C Accelerometer with AVR ATmega8

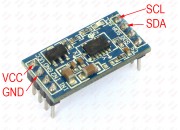
This article on Digital Wizard describes everything about interfacing MMA7455 I2C accelerometer with an AVR ATmega8 MCU. A C library compatible with Atmel Studio 6 is also provide with step by step instructions to get it properly installed in your new AS6 project. Each function in the library is also explained in details. Finally we make a demo program to show raw acceleration readings for each axis on a LCD. Read more …

PC Controlled Robot

In this tutorial we will discuss a simple PC controlled robot. The Robot PC link will be a RS232 serial line. The robot will have only five commands. Move forward (RS232 char ‘F’ or ‘f’) Move backward (RS232 char ‘B’ or ‘b’) Turn Left (RS232 char ‘L’ or ‘l’) Turn Right (RS232 char ‘R’ or ‘r’) Stop (RS232 char ‘S’ or ‘s’) To keep things as simple as possible, in this example we will use terminal software RealTerm for sending commands to the robot. Later on a dedicated software can be written on PC end to control the robot. The Robot’s Hardware The robot’s hardware will be a simple differential drive using two 200RPM DC Gear motor mounted on a HQ Metal Chassis with a front castor wheel. On the back motors we have mounted plastic wheels. More about differential drive is explained in this tutorial. Gear Motors   Wheels   Metal Chassis   Remove motor’s nut   Insert the motor   Fasten the nuts again   Both motors installed   Front Castor wheel   Installing the front castor   Mounting hole for wheels screw   Mounting the wheels   Chassis is ready! The Electronics The robot is controlled using xBoard v2.0 which has ATmega32 as main CPU and integrated motor drivers. We have connected xBoard v2.0 with PC using […]

Obstacle Avoiding Robot using AVR ATmega32 – Part II

Hello and Welcome back to the second part of Obstacle Avoiding Robot Tutorial. In the last part we studied the drive system and the mechanical construction of our robot. In this part we will make the sensor part. The sensors will help our robot detect obstacle in its path. The sensor system is of very basic type of infrared(IR) reflectance sensor. It is made up of an IR Transmitter and an IR receiver. The IR transmitter is an IR LED which emits light in IR spectrum that is invisible to human eye. The IR receiver can detect those rays. A Matching Pair of IR Rx and Tx, The Blue One is Tx (LED). The IR Sensor Element The IR Sensor element is made up of an IR Tx,IR Rx and few resistors. The schematic is given below. We need three such elements mounted in front of the robot to sense obstacles in front of it. IR Reflectance sensor schematic. As you can see the sensor element has two pins for power supply and an Output pin. The output is a variable voltage between 0 and 5v depending on the type and distance of the obstacle. It tends to 5v as some obstacle comes near it. IR Sensor Construction Guidelines. The value of R1 is 150 ohms and R2 is 22K. […]

Obstacle Avoiding Robot using AVR ATmega32 – Part I

Hi and Welcome All, In this tutorial series I will show you how to make a simple obstacle avoiding robot using the xBoard v2.0 microcontroller board. xBoard v2.0 is well suited for developing small intelligent robots as it is compact in size, has four DC motor controller, can be programmed using USB Port and many other features. It is also very easy to learn and use. The xAPI, which is a set of C functions which makes complex programming tasks such as PWM ,LCD, Remote Control etc very easy for beginners. You can buy it from here http://shop.extremeelectronics.co.in/product_info.php?cPath=23&products_id=111 Its design is open so if you don’t want to buy the board you can make it yourself at home by the help of its schematic. The Robo’s Task The task of our robo is simple. To move randomly in an area avoiding obstacles, that’s it ! Though the task is simple, its a complete autonomous robot in itself. It has a brain which reads sensors and makes decisions and command the motors. In the course of making the robot you will learn various basic techniques which will be of great use for your further projects. Our Final Robot will look like this. AVR ATmega32 Based Obstacle Avoiding Robot The following Video Demo Shows the Robo in Action The following Video was […]
xBoard™ :: ATmega32 Development Board.

Here are some Videos that demonstrate the xBoard – a easy to use but powerful development system for Atmel AVR ATmega32 microcontrollers. For complete information about the xBoard™ see http://xBoard.eXtremeElectronics.co.in Video #1 xBoard™ :: AVR Dev-Board – Introduction This video tutorial gives you a quick introduction of the xBoard; easy-to-use and powerful Atmel AVR AtMega32 Microcontroller Development Board. Video #2 xBoard™ :: AVR Dev-Board – Hello World In this tutorial we will introduce you to the basic steps needed set-up and develop programs for the xBoard. We’ll write a LED blinking project which is a Hello World project for microcontroller arena. xBoard – a easy-to-use and powerful Atmel AVR AtMega32 Microcontroller Development Board. Video #3 xBoard™ :: AVR Dev-Board – LCD Interfacing This video tutorial teaches you how you can interface a standard 16×2 LCD Module with the xBoard – easy-to-use and powerful Atmel AVR AtMega32 Microcontroller Development Board. Video #4 xBoard™ :: AVR Dev-Board – IR-Remote This video tutorial shows you how to interface a DVD Player Infrared Remote Control with the xBoard, a easy-to-use and powerful Atmel AVR AtMega32 Microcontroller Development Board.