Hi and Welcome All,
In this tutorial series I will show you how to make a simple obstacle avoiding robot using the xBoard v2.0 microcontroller board. xBoard v2.0 is well suited for developing small intelligent robots as it is compact in size, has four DC motor controller, can be programmed using USB Port and many other features. It is also very easy to learn and use. The xAPI, which is a set of C functions which makes complex programming tasks such as PWM ,LCD, Remote Control etc very easy for beginners. You can buy it from here
http://shop.extremeelectronics.co.in/product_info.php?cPath=23&products_id=111
Its design is open so if you don’t want to buy the board you can make it yourself at home by the help of its schematic.
The Robo’s Task
The task of our robo is simple. To move randomly in an area avoiding obstacles, that’s it ! Though the task is simple, its a complete autonomous robot in itself. It has a brain which reads sensors and makes decisions and command the motors.
In the course of making the robot you will learn various basic techniques which will be of great use for your further projects.
Our Final Robot will look like this.
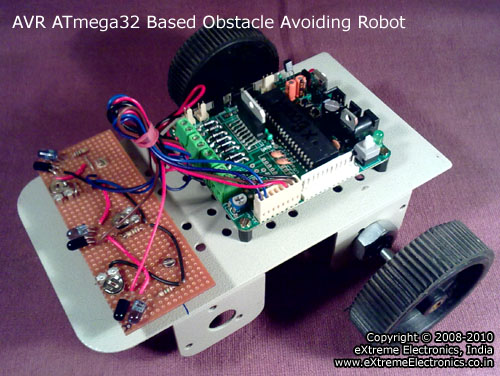 |
AVR ATmega32 Based Obstacle Avoiding Robot |
The following Video Demo Shows the Robo in Action
The following Video was submitted by Mr. André Giovann
We thanks Mr. Giovann for sharing his experience!
Mechanical Construction
The robot is built around a high quality metal chassis which you can purchase from any robotics dealer. You can also buy it from our online store and we will appreciate your help. The robot is driven by two 200 RPM DC Gear motor. It uses differential drive system and has one castor wheel in the front. The wheels are directly coupled with the motors shaft.
The motors are mounted to the chassis by a nut provided in the shaft of the motor.
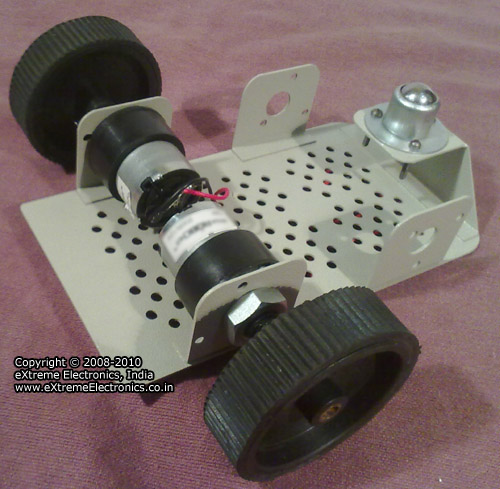 |
Differential Drive System with two back wheels and a front castor wheel |
The xBoard v2.0 is mounted by using the mounting kit provided with xBoard v2.0. The mounting kit includes screws, nuts and standoffs. The xBoard v2.0 is so designed that its mounting holes are neatly aligned with the holes in chassis.
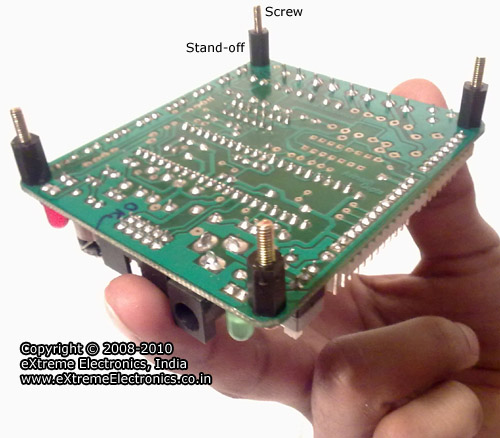 |
xBoard v2.0 is the brain of our robot. |
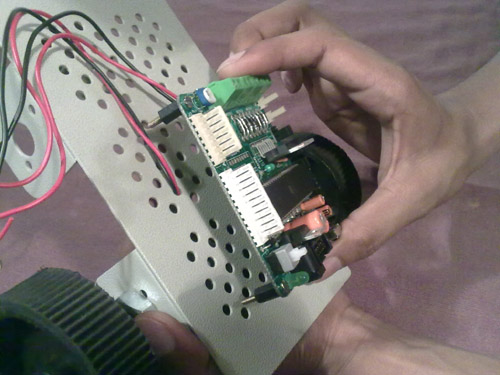 |
xBoard v2.0 is Easy to Mount |
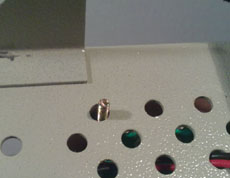
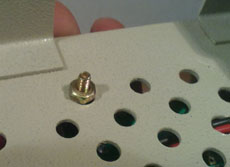 |
Mounting xBoard v2.0 with screws. |
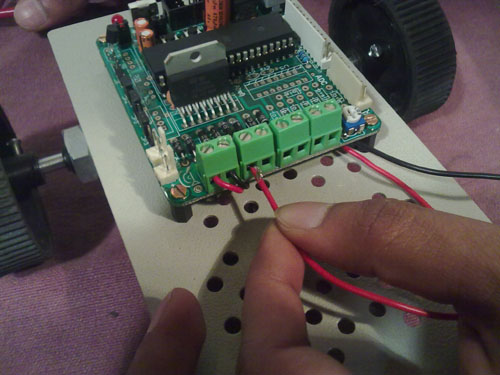 |
Connecting Motor Wires |
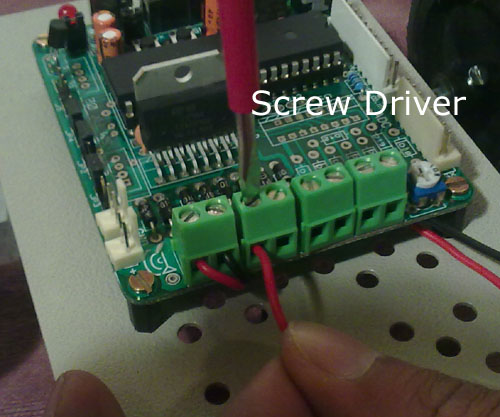 |
Just Plug and Play ! |
Differential Drive Explained
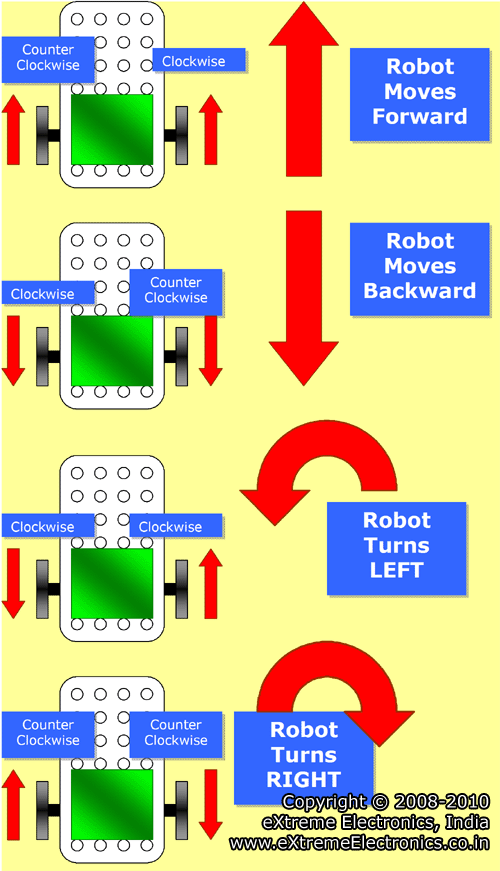
Differential drive is a drive system in which both motion and steering can be done by two set of powered wheels. In differential drive their is a set of LEFT wheels and a set of RIGHT wheels. Both are powered. It does not requires turning of front wheel for the steering like we steer car or bikes. To turn the vehicle (or robo) the LEFT and RIGHT wheels are rotated at "different" speeds. That’s why its called differential drive. For example If the RIGHT wheels rotates faster than the LEFT wheels then the robot will turn towards LEFT.
For this robot we will use the following rotation of wheel for the steering and straight motion.
| Motion | LEFT Wheel | RIGHT Wheel |
| Forward | Counter Clockwise | Clockwise |
| Backward | Clockwise | Counter Clockwise |
| Rotate LEFT | Clockwise | Clockwise |
| Rotate RIGHT | Counter Clockwise | Counter Clockwise |
The following diagram explains robots differential drive in details
Differential Drive System |
So moving and steering the robot is just the matter of controlling two DC motors. You can easily access DC motors from xAPI. The details are given here.
Once you go through the articles you know how to start a particular motor either in CW or CCW direction. Here MotorA will be the right motor and the MotorB will be the left motor. So the following code snippets does the job.
Move Robo Forward

MotorA(MOTOR_CW,255);	//Right Motor Moves Clockwise (CW) with Full Speed (255)
MotorB(MOTOR_CCW,255); //Left Motor Moves Counter Clockwise (CCW) with Full Speed (255)

Move Robo Backward
MotorA(MOTOR_CCW,255);	//Right Motor Moves Counter Clockwise (CCW) with Full Speed (255)
MotorB(MOTOR_CW,255); //Left Motor Moves  Clockwise (CW) with Full Speed (255)

Rotate Robo Left
MotorA(MOTOR_CW,255);	//Right Motor Moves Clockwise (CW) with Full Speed (255)
MotorB(MOTOR_CW,255); //Left Motor Moves  Clockwise (CW) with Full Speed (255)

Rotate Robo Right
MotorA(MOTOR_CCW,255);	//Right Motor Moves Counter Clockwise (CCW) with Full Speed (255)
MotorB(MOTOR_CCW,255); //Left Motor Moves  Counter Clockwise (CCW) with Full Speed (255)
I have explained the code here so it does not create confusion when the whole program (which is reasonably large)of the robot is presented to you.
To know more about the functions MotorA and MotorB please see their documentation here.
That’s all folks for this part! Don’t forget to post you comment and feedback.
And remember to subscribe your email to get the next part as soon as it is published. Look For Feedburner Box in the sidebar.
Proceed To Part II of This Tutorial >>
Facing problem with your embedded, electronics or robotics project? We are here to help!
Post a help request.



Pingback: Obstacle Avoiding Robot using AVR ATmega32 – Part II | eXtreme Electronics
Hey I think something is wrong in the code for dc motor to move robot forward both the motors should be ccw and for backward movement the motors should be cw correct me if i’am wrong!
thanks!
Hello brother, i am in finar year of my engineering and i need to make my final project can you please help me making obstacle avoiding robot?
Actually all this thig given in this post is going above my mind.
Thanks
friend,actually the cc & c movement might also depend on the placement of the motors. i mean to say that the motors are placed with opposite polarity to each other. due to which,during forward/backward movement the motors have to move in same direction,but with different polarity.
thank u
Oh sorry! I got it after looking at the diagram ,It is shows from different views.
Thanks!
Oh sorry! I got it after looking at the diagram ,It is shows from different view.
Thanks!
It is a very good tutorial. pl send me some hint of AVR GCC program code for distance mesurement using paralox ping ultrasound module for xBoard v2.0. I wait for your reply.
Pingback: Obstacle Avoiding Robot using AVR ATmega32 – Part III | eXtreme Electronics
thanks for the tutorial. keep doing the good work and thanks once again
thanks Sir
sir i start reading from today.it was very good.can i get article for fire fighting robot.
hi sir i also want to make fire fighting robot pls sir give me a guidence..
@sachi sahu. i also want to make fire fight robot.. contact me pls martyn0007@gmail.com
hi,sir.today is the 1st time i m going through your tutorials,and i liked it very much.i will be very thankful to you if you can give me some idea on making manual robots,i.e,the circuit diagram and the list of equipments required.
Thnx for such an useful Information we r doing a project based on this, So this stuff is really gonna help us in making ‘Obstacle Avoider’.once again thanx!
Hello,
I set up the project using servants as reductants for
wheels. See how it was here: http://v2reletrico.blogspot.com/p/downloads.html
It worked 100%. Thank extreme
electronics, has ever posted a better design.
Sincerely,
André Giovanni
Hello Giovani,
Thank you for sharing your video. Could you please share the schematic. Are you using transistor or motor driver for motor control. Thanks in advance.
Will u please help me how to use this robot going to a particular place avoiding obstacles.
Hi Avinash,
I wanted to make a robot which can move and lift some weight (for example 5 kg steel rod) and put it some distance away (10 m away) That is the basic application but later I have to interface many sensors in it. My question is is your development board xBoard v2.0 is helpful for that. I want to use DC gear motor. Can I use credit card to buy.
Hi Avinash,
Please do reply……
Congratulations on the new site, was very good!
Hug
🙂
André Giovanni
Brazil
Pingback: PC Controlled Robot | eXtreme Electronics
Hello,
Do you have a complete kit we can purchase for the obstacle avoiding robot? I would like to teach my son how to build and program this robot. We would need it shipped to the US. Please email a response so I purchase the kit quickly.
Thanks,
Craig
Hello,
Do you have a complete kit we can purchase for the obstacle avoiding robot? I would like to teach my son how to build and program this robot. We would need it shipped to the US. Please email a response so I can purchase the kit quickly.
Thanks,
Craig
hello sir,
i am also a beginner,but i would like to make an obstacle avoiding robot that can can avoid obstacles and track a specific location as its additional feature,can you help me please…….thanks a lot
can i get also the codes of this project…i hope to see this on my email.thanks…thanks
Hi guys! Is there anyone who have a good idea about this project? I really need it right away. I tried to contact everyone but not any active response…
Sir thanks a lot for your tutorial.and I have a doubt .ie,am try to assemble PCB for this .can I use l293d instead of l298.and I hope you replay.
i am doing project based on this object avoidance , i am using two motors one to drive the robot (Motor B) and another to steer the robot (Motor A) so i have modified the program kindly help me whether the program is correct
Program:
move robo Frwd:
MotorA(MOTOR_CW,0); //Right Motor Moves Clockwise (CW) with no Speed (0)
MotorB(MOTOR_CCW,255); //Left Motor Moves Counter Clockwise (CCW) with Full Speed (255)
Move Robo Backward
MotorA(MOTOR_CCW,0); //Right Motor Moves Counter Clockwise (CCW) with no Speed (0)
MotorB(MOTOR_CW,255); //Left Motor Moves Clockwise (CW) with Full Speed (255)
Rotate Robo Left
MotorA(MOTOR_CW,255); //Right Motor Moves Clockwise (CW) with Full Speed (255)
MotorB(MOTOR_CW,255); //Left Motor Moves Clockwise (CW) with Full Speed (255)
Rotate Robo Right
MotorA(MOTOR_CCW,255); //Right Motor Moves Counter Clockwise (CCW) with Full Speed (255)
MotorB(MOTOR_CCW,255); //Left Motor Moves Counter Clockwise (CCW) with Full Speed (255)