ProGFX supports drawing of images and icons in form of bitmaps. We are also providing a simple PC based tool that can help convert a common bitmap file to a C header file. This C header file contains the image data in a format that ProGFX can draw easily on a GLCD display. The ProGFX function that displays a bitmap is explained below.
void GFXDrawImage(UINT8 x,UINT8 y,prog_uint8_t *img)

	This function Draws an Image at the specified x,y co-ordinate.

Argument:
	x = x co-ordinate.
	y = y co-ordinate.

	img = image to draw

Return Value
	NONE
Creating a Project Folder
Create a folder named "BasicImageDemo" which will hold all the file of our project. Inside this folder create a sub folder named "images".
Creating the BMP File
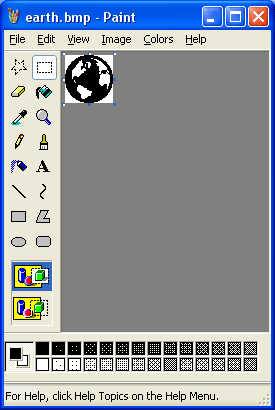
You can use any graphic editing program which supports saving in BMP format to create graphics for your application. The simplest one that comes with MS Windows is enough for this tutorial. Use MS Paint to draw any image you like as shown below. Please make sure that the image is not more than 128×64 pixel because our screen resolution is 128×64. Here I have drawn the earth whose dimension is 48×48 pixels.
|
A image(earth) drawn using MS Paint. |
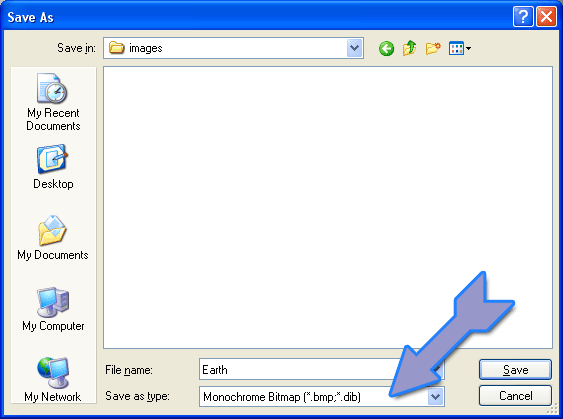
After the drawing is finish save it by using File->Save As command. Save it into the folder named "images" which was created at the beginning of this article. Just makes sure it is saved as Monochrome bitmap.
Converting the BMP file to C Header File for AVR
You can use the tool Image Converter (download link at the end) to convert the above created BMP file to a standard C header file.
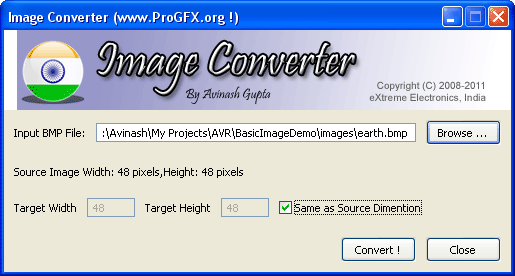
The interface is simple, just browse the BMP file, Set the check mark "Same as Source Dimension" and hit "Convert!"
A file named "earth_bmp.h" (assuming the original BMP file name was "earth.bmp") will be created in the same folder.
Drawing the image to GLCD Screen
To draw the image to GLCD you need to call the following function.
GFXDrawImage(0,0,earth_bmp);
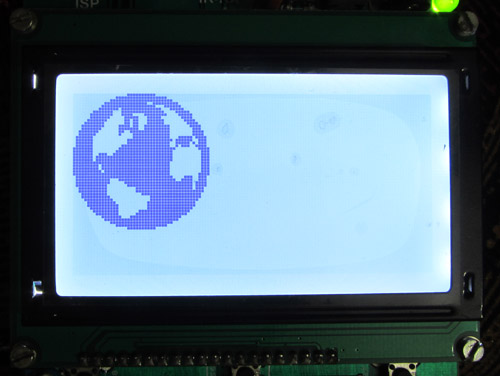
The above code will draws the image at the co-ordinate 0,0 of the screen.
The AVR Studio project must be created exactly as described in this tutorial.
The hardware must be made as described here.
Image Drawing Demo 1
/******************************************************************************

ProGFX Sample Codes.

   Describe how to work with bitmaps.
   The bitmap image is contained in the earth_bmp.h file.
   The image is drawn using GFXDrawImage() function at x=0 y=0 location
   on screen.

Visit
www.ProGFX.org for more details.

Author
   Avinash Gupta

Copyright 2008-2011
eXtreme Electronics, India
All rights reserved.

******************************************************************************/

/* Standard Graphic Driver */
#include <gfx.h>

/* Our Bitmap file created with Image Converter */
#include "images/earth_bmp.h"

void main()
{
   //Initialize the Graphic Subsystem

   GFXInit();

   //Draw the earth bitmap at x=0,y=0
   GFXDrawImage(0,0,earth_bmp);

   //Update the screen
   GFXUpdate();

   //Now wait and wait and wait ...
   while(1);
}
|
Output of AVR Image Drawing Demo 1 |
Image Drawing Demo 2
/******************************************************************************

ProGFX Sample Codes.

   Describe how to work with bitmaps. The demo shows a series of
   image at the center of the screen one after another.
   The bitmap images are contained in following files :-

     "images/balance_bmp.h"
     "images/bug_bmp.h"
     "images/calc_bmp.h"
     "images/coffe_cup_bmp.h"
     "images/cut_bmp.h"
     "images/signal_bmp.h"
     "images/battery_bmp.h"
     "images/calendar_bmp.h"


   The images are drawn using GFXDrawImage() function at x=40 y=8 location
   on screen.

Visit
www.ProGFX.org for more details.

Author
   Avinash Gupta


Copyright 2008-2011
eXtreme Electronics, India
All rights reserved.

******************************************************************************/
#include <gfx.h>
#include <util/delay.h>

//Include the image files
#include "images/balance_bmp.h"
#include "images/bug_bmp.h"
#include "images/calc_bmp.h"
#include "images/coffe_cup_bmp.h"
#include "images/cut_bmp.h"

#include "images/signal_bmp.h"
#include "images/battery_bmp.h"
#include "images/calendar_bmp.h"

//Simple wait function
void Wait()
{
   uint8_t i;
   for(i=0;i<120;i++)
      _delay_loop_2(0);
}


void main()
{
   //Initialize the lcd driver
   GFXInit();

   //Draw the border
   GFXRect(0,0,127,63,GFX_COLOR_BLACK);
   GFXRect(1,1,126,62,GFX_COLOR_BLACK);

   while(1)
   {

      //Draw the image at location 40,8

      GFXDrawImage(40,8,balance_bmp);

      //Update
      GFXUpdate();

      Wait();

      //Draw the image at location 40,8
      GFXDrawImage(40,8,bug_bmp);

      //Update

      GFXUpdate();

      Wait();

      //Draw the image at location 40,8
      GFXDrawImage(40,8,calc_bmp);

      //Update
      GFXUpdate();

      Wait();

      //Draw the image at location 40,8
      GFXDrawImage(40,8,coffe_cup_bmp);

      //Update

      GFXUpdate();

      Wait();

      //Draw the image at location 40,8
      GFXDrawImage(40,8,cut_bmp);

      //Update
      GFXUpdate();

      Wait();

      //Draw the image at location 40,8
      GFXDrawImage(40,8,signal_bmp);

      //Update

      GFXUpdate();

      Wait();

      //Draw the image at location 40,8
      GFXDrawImage(40,8,battery_bmp);

      //Update
      GFXUpdate();

      Wait();

      //Draw the image at location 40,8
      GFXDrawImage(40,8,calendar_bmp);

      //Update

      GFXUpdate();

      Wait();
   }

}
- Download Complete AVR Studio Project.
- Download HEX file ready to burn.
- Download the image pack in BMP format.
|
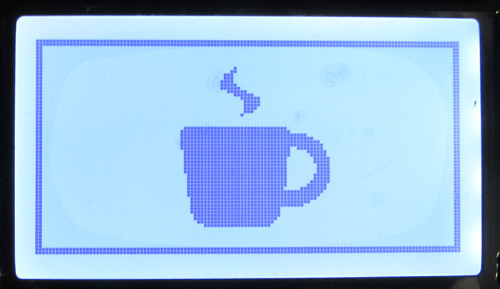
Output of AVR Image Drawing Demo 2 |
Video for Image Drawing on GLCD with AVR ATmega32
The Image Converter
The GLCD Development Board.
All codes were tested on the GLCD Development Board. The hex file provided above can be burnt directly to the GLCD Dev Board using a ISP Programmer.
Other Parts of the Tutorial Series
- Part I – Introduction to GLCD and Hardware Setup
- Part II – Downloading and Installing ProGFX!
- Part III – Explains Graphic Primitive Functions.
- Part IV – Font and Text Handling Functions.
Facing problem with your embedded, electronics or robotics project? We are here to help!
Post a help request.



hi avinash,
thanks to god,u r ok.and thanks to u for re-writting ur helpful tutorials again.i hope u will continue ur tutorial writting.god bless u……………..
This image conversion portion was not clear in “Vassilis Serasidis” – “oscilloscope making article even I tried his utility for image conversion – and did not get any result. So thank you for state forward description of image conversion and displaying in GLCD.
We human being are very greedy, if we get something we want more, can we get some tutorial/project on colour GLCD!
regards,
Uttam Dutta
@Uttam Dutta,
Displaying a static image on a colour TFT is simple but of NO use. To use the LCD properly we need a rich set of functions including.
0) Low level bus driver(links CPU with TFTs memory).
1) Low level TFT driver.
2) Low level primitive functions.
3) Text and font system. (highly sophisticated)
4) Windowing system.
5) GUI Layer (including support for Buttons, Checks, Radio,list,menu,message box etc)(even the user need to know about data structures like Linked lists and Ques)
6) Multithreading (at least support for two thread)
7) Solid IPC(inter process communication) standard like a message queque used in Windows Operating System.
http://www.winprog.org/tutorial/window_click.html
sir ..,
if i convert the BMP image i am getting values in 8bits ( RGB ) … how can i convert into 24 bits ( 8 bits per channeel * means R – 8bit , G – 8 bit , B -8bit) .., i am working ARM7 .., i need help to diaplay image in 3.2 inch TFT touch screen LCD