What is a development board?
In order to learn any MCU like AVR we need a AVR MCU that has all the basic connections like power supply, crystal oscillator, proper reset signal and an ISP connector for uploading a program. All these things are required for any project you will make. A development board is a circuit board that contains all these connections and it has connectors for IO pins of MCU so that they can be connected to any external circuit with ease. So as you see its is like a basic framework. Once you make a good development board and test it, you will have a solid foundation and for your project you can concentrate on the specific requirement of that project. This will also reduce the chance of making errors. Some more complicated development boards have a RS232 level converters(for serial communication) ,motor control chips etc.Now let’s do it!
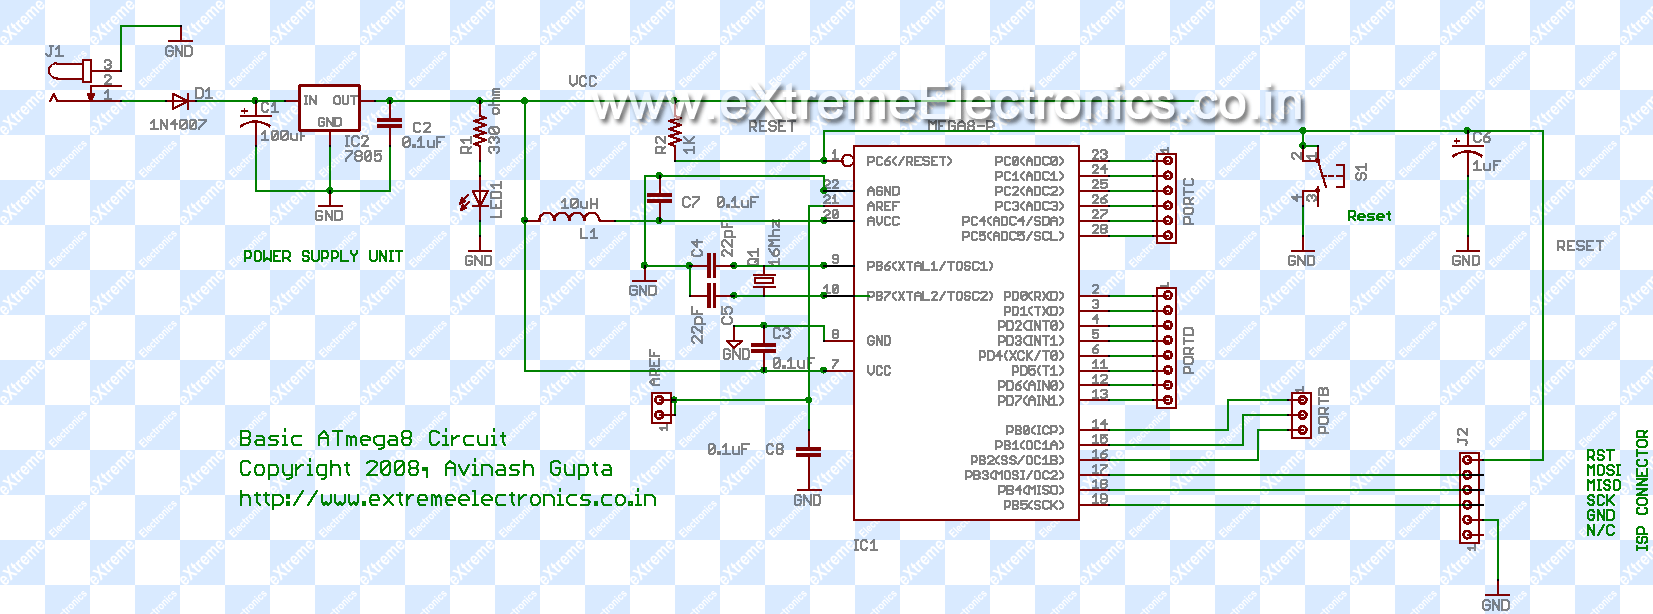
I have described the basic connections required by any AVR MCU in Part III of my AVR tutorial series so I am jumping right to the schematic.Fig – Development board schematic. |
|
|
Things you need are
| S.No | Components | Name | Value |
01 |
ATmega8 | IC1 | |
02 |
Voltage Regulator IC7805 | IC2 | |
03 |
Resistance | R1 | 330ohm |
04 |
Resistance | R2 | 1k |
05 |
Capacitor(Electrolytic/Polar) | C1 | 100uF |
06 |
Capacitor(Electrolytic/Polar) | C2 | 100uF |
07 |
Capacitor(Electrolytic/Polar) | C6 | 1uF |
08 |
Capacitor(Ceramic disk type) | C3 | 0.1uF |
09 |
Capacitor(Ceramic disk type) | C4 | 22pF |
10 |
Capacitor(Ceramic disk type) | C5 | 22pF |
11 |
Capacitor(Ceramic disk type) | C6 | 0.1uF |
12 |
Inductor | L1 | 10uH |
13 |
Diode | D1 | 1N4007 |
14 |
Crystal Oscillator | Q1 | 16Mhz |
15 |
LED | LED1 | |
16 |
Tactile push to on switch | S1 | |
17 |
Connectors,IC Socket, Power jack, general purpose PCBs, wires etc |
Note: The voltage rating of C1 must be at least twice the input voltage while that of C2 & C6 can be 12 Volts or more
|
|
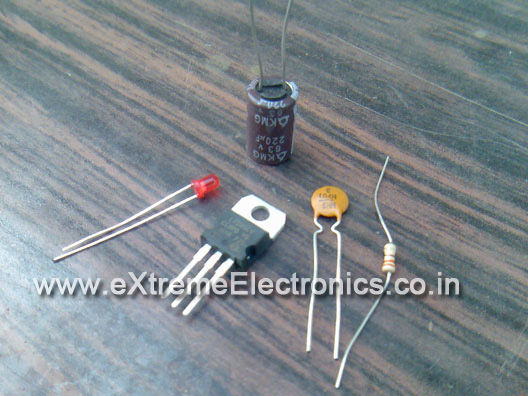
Fig – Components for power supply |
|
|
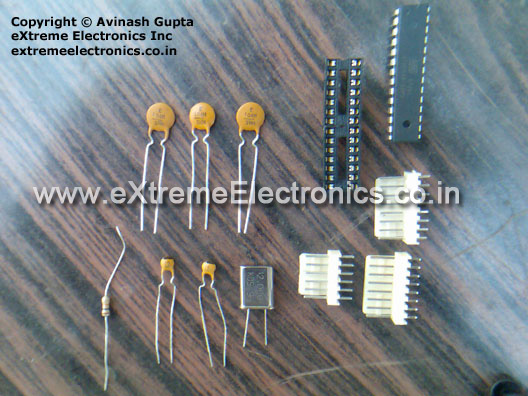
Fig – ATmega8, Resistors, Capacitors and Connectors. |
|
|
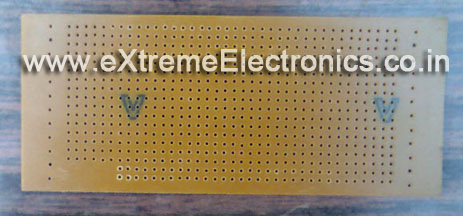
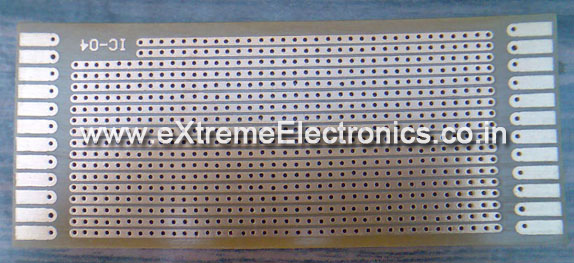
Fig – Veroboard / General purpose PCB – Top View |
|
|
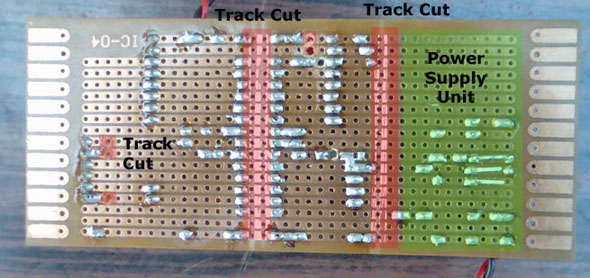
Fig – Veroboard / General purpose PCB – Bottom View |
|
|
Fig – Connectors for easy connection/disconnection from MCU pins |
|
|
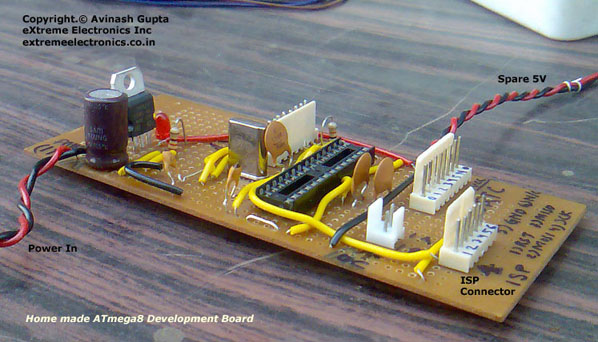
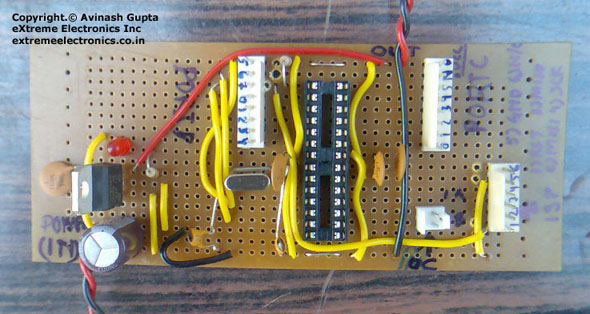
Fig – Final Board with all components assembled. |
|
|
Note
Some difference in my prototype and the schematic.- The value of C2 is 100uF but I have used 0.1uF ceramic type.
- I have not used the reverse protection diode D1. But you should for safety.
- I have used 220uF capacitor as C1. Anything over 100uF will do. Also the voltage rating must be double the input supply voltage
- I have not used the reset switch. However, it is very convenient if we have one.
- I have not used C6(1uF) as it is required for reset switch
- I have not used L1 for connecting the AVcc to Vcc, instead I have directly connected them. But if you are planning to use the ADC you should use the L1 as it makes the ADC much accurate by suppressing noise
- I have connected a 0.1uF capacitor from Vref to GND as it is suggested by datasheet. Only necessary if you are using ADC.
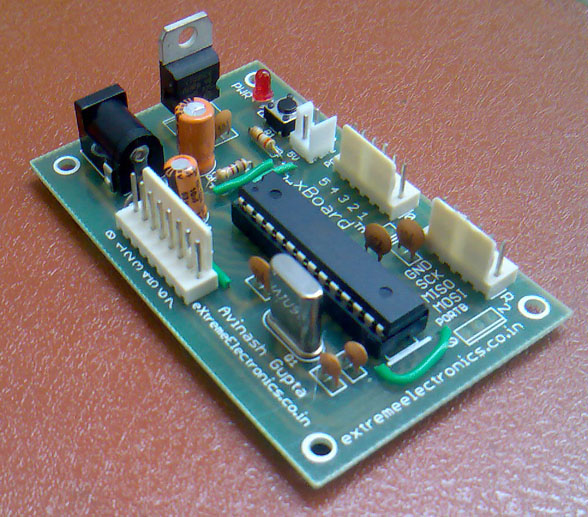
The same board made with a professional PCB.
|
|
Fig – A simple ATmega8 Devboard |
|
|
You can buy it from here at only Rs 450/-. Sorry, but currently I ship it only within India (no International shipping right now).
Download PDF version | Get Adobe Reader Free !!!
Facing problem with your embedded, electronics or robotics project? We are here to help!
Post a help request.




Pingback: Using the Analog To Digital Converter. | eXtreme Electronics
Pingback: Multiplexed Seven Segment Displays - Part II | eXtreme Electronics
Hi,
This is great! Just like the board sold by sparkfun.com but better 🙂 I am a very beginner with microcontrollers and circuit designs. Would you kindly explain how you come about to use capacitors and the L1? I know the capacitors would smooth out the voltage to make it more stable, etc. But how did you come about the capacitance values?
What kinds of tolerances in your resistors and capacitors, e.g., 1%, etc.?
Thanks. And GREAT WORK!
Hi AL,
The ceramic capacitors (0.1uF) are Decoupling capacitor capacitor. They are used to decouple the power supply from the MCU. The advantage is they bypass the spikes frm the power supply. They are placed close to the MCU. The standard value used for this purpose is 0.1uF ceramic disk type.
The C1 (100uF) is used as a filter capacitor. Its purpose is to further smooth the In put DC input which you may supply from a transformer. Its value is not so important just select is according to the current requirement of the circuit. It the circuit is a consuming one you can increase it (470uF or even 1000uF).
The two capacitors 22pF connected to the Crystal. Their value is suggested in the ATmega8 Datasheet (see page 27)
The L1 (inductor) C7 is used as suggested in the dataseet page 202 “ADC Noice Cancelling Techniques”.
So Now you know how the value are calculated you can go ahead and start building !!!
For any help we are here 😀
The C6
Hello,
have a nice day
Since you are not shipping to Germany, you could email me the gerber files for the simple ATmega8 devboard.
unbehaun.andreas@gmail.com
greeting
Andreas
Hi,
Thanks for the answers. That helps a lot. I happen to find ModernDevice’s tiny Atmel dev board. It’s very interesting. See http://www.moderndevice.com/RBBB_revB.shtml.
In your answer, you referred to page 202 for the “ADC Noise Cancellation Techniques.” All the Atmel datasheets I looked have 22 or pages not to 200+ pages. 🙁 They do refer to those pages as well. I kept searching and searching on the atmel.com site but can’t find the complete (200+ pages) of the atmel datasheet. Do you know the link by any chance?
Thanks.
Found it!
http://www.atmel.com/dyn/products/datasheets.asp?family_id=607
Pingback: Using IR remote with AVR MCUs | eXtreme Electronics
Pingback: Part III - Making Programmer and Target. | eXtreme Electronics
Pingback: Using the USART of AVR Microcontrollers : Reading and Writing Data | eXtreme Electronics
Nice pictures man! I really liked you site. I too am a hobby embedded developer!
Hello,
I have to do a project using ATmega16 and i make your Home Made AVR Devboard and the programmer for serial. I use PonyProg .
And…i have some problems:
I connect the programmer and Devboard to the PC serial, and when i tray to read the fuse bits, i receive the next error: “device missing or unknown device -24”, i clink the Ignore button and finally read the fuse bits, but all are selected.
When i tray to write o small program into controller (i tray to on/off a LED)i receive the same error; i hit the Ignore button, PonyProg write something, verify something, but finally he says : “Write fail!!”.
So … what is the problem? I skip something??
One more question: when i write something into controller , the Devboard must to be power ?(i tray the both )
Hello Raul,
🙂
Please check connections. Communication with Programmer <-> Micro is not ok.
Yes devboard should be powered while programming.
Keep all cables as short as possible. Check DB9 PIN connections. Select Correct COM Port.
If all else fails buy a ready made USB Port based programmer from here
http://shop.extremeelectronics.co.in/product_info.php?cPath=21&products_id=28
Hey, Is it possible for you to provide the PCB design of the Devboard?
I am interested in making one myself.
I’m interested also if you can give pcb layout of your Devboard so we can make it at home…
you are doing good work, looking forward to your tutorial on rf transceiver.
Hi Avinash,
Nice kits! I am in the US (used to live in Hyderabad) and can purchase these from you and sell them here in the US. I have friends/family that routinely fly back and forth. Which city are you located in? If it is Hyderabad/Bangalore/Chennai, I can have somebody purchase some of them and get them to me over here.
Thanks.
Mitesh
aminmitesh@hotmail.com
@Mitesh
Thanks! We are in Jamshedpur. I can also send these to you by DHL Express. We export many Items by DHL Express. Please tell me your background. Do you have experience in E business or Bussiness Related to electronics? Then you may represent us in USA. After India our Most of our Visitors are from USA and its a Great Market.
PLEASE REPLY TO MY EMAIL avinash [ at ] eXtremeElectronics.co.in
Hi Avinash
really gr8 job
You know Avinash , you are a good guy.
I really like the tutorials, (party because i had summer training on Atmega microcontrollers) these tutorials really helps and i am looking forward for more (specially on wireless module [read Zigbee])
🙂
i want to make the development board for atmega16 …….is there some ckt diagram for this
You are really really helping the future generation of engineers. I used to work on user interface (front ends) using all sorts of protocols which made me interested in embedded systems. I find AVRs particularly useful and interesting. Your tutorials and projects have made learning rather easy and stimulated my thought process.
@Stravy
Thanks ! 😉
can we use the same ckt diagram for atmega 16 connecting appropriately the pin nos?
Thank you a good deal! I truly enjoyed reading this.Looking via these posts and the info you?ve provided I can appreciate that I nonetheless have a great deal of things to discover. I will keep reading and maintain re-visiting.
Can you share the pcb layout of the professional version? I’d love to make that neat one in my home.
hey,
plz provide the pcb layuot of this poject…..
Thanks in Advance
Mujtaba, I’ll publish one more functional dev board design soon.
gud work and easy to understand……
i have borrowed your idea to create my own dev board with more peripherals attached to in. pls check
http://goavr.blogspot.com/
Hi
I have a question about the used atmega8 in the circuit. Is there any code flashed in it or it is used directly from the store without any hex code inserted in it
Thank you for responding
hi
am a beginner to this.
i am doing a protect for my uni.i was planing to use arduno mega 2560(coz i need 16 analog inputs). but now they saying that i ve to use costume made(by my self) and not to use developer board.
can any one help me with this.coz i ve planed my coding
and every thing for mega.
thank you
Hi
i need ATMEGA16 development kit, where i can get it in bangalore and how is the price.
Can u tell me any bodys knows
Buy this board
http://store.extremeelectronics.co.in/xBoard-v2.0.html
Dear Sir how to make professional PCB at home , sir i wanna build neat and clean orginal type pcb , and how to print my name on pcb.
Hi!
Can you please tell me where can I get those connector (male) from?
Greetings