To bring graphic LCD to the reach of every embedded system engineer we have developed a complete hardware and software suite that can be used to develop rich graphical application easily and quickly. More information on graphical programming with GLCD and AVR ATmega series MCU is discussed in the following articles.
- Part I – Introduction to GLCD and Hardware Setup
- Part II – Downloading and Installing ProGFX!
- Part III – Explains Graphic Primitive Functions.
- Part IV – Font and Text Handling Functions.
The aim is to create a common hardware and software platform to create and share graphical applications. The user can concentrate only on application level, leaving the low level details handled by ProGFX. The advantage is that the end application can be easily shared among the user of ProGFX boards. The applications are more usable because any ProGFX programmer can easily understand the application logic (due to clean uniform api) and modify the application to suit their need.
eXtreme Electronics, India will work towards releasing many open source ProGFX applications for their users.
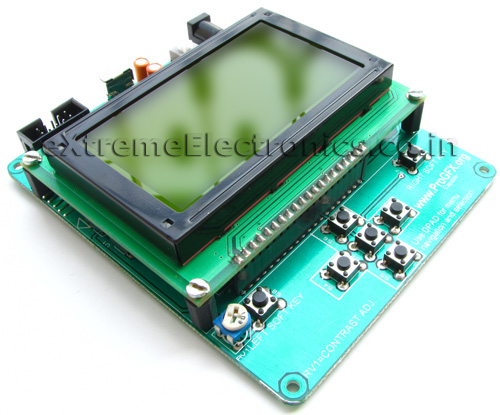
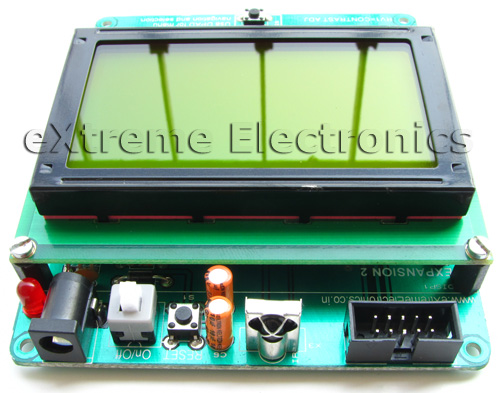
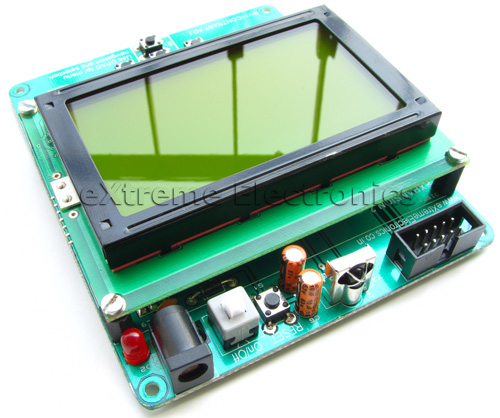
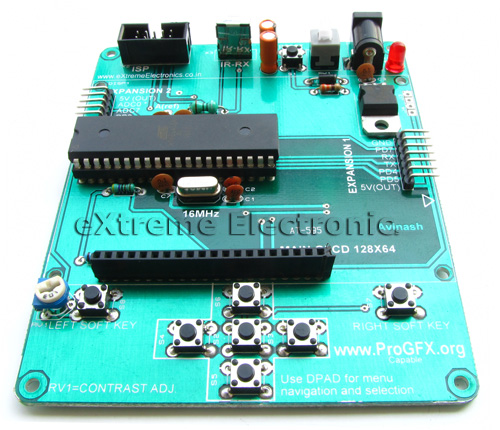
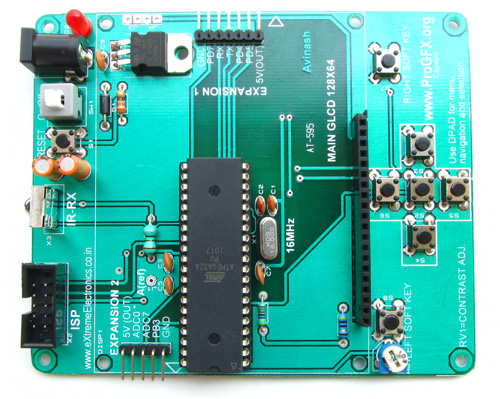
AVR Graphical LCD Development Board |
AVR Graphical LCD Development Board |
Product Features
- Out of the Box performance (Just bring it out and power up!)
- Step by step tutorial to learn Graphic Programming.
- Can be programmed by ISP Programmer.
- On board ATmega32A PU running at 16MIPS!
- IR Receiver and Decoder.
- Expandable (connect RFID Readers, Accelerometers, Temperature Sensors, Servo Motors etc)
- 5 Button DPAD for GUI Interface.
- 2 Soft keys.
Purchasing the AVR GLCD Development Board
You can buy the GLCD Development Board from our online store
Facing problem with your embedded, electronics or robotics project? We are here to help!
Post a help request.



waitin for it 🙂
Dear Mr Avinash, I want to make this glcd development board my self. May I have the schematic diagram please. Thanks in advance.
@Nibir,
Can I have one reason why you want to make this circuit your self???
Dear Mr. Avinash, I am already having almost all the required components for this kit. So I don’t want to buy the complete kit right now. I have drawn the schematic to some extent, I need to know the connections for the DPAD buttons and the two software assigned buttons. I make my PCB myself using toner transfer method. So if you please let me know about the connection details of the swithes only, that will be very helpful.
Thanks and Regards.
@Nibir,
Since you are having lots of free time to do manual work like PCB making and soldering, so please make the schematic and codes your self too. They will teach you much more … good bye.
hello Mr. avinash,
it would be decent if you had replied politely to Mr.Nibir . you could have simply said ckt schematic cannot be revealed. Its because of we customers your talent is known and its we who buy your products! so better talk politely or simply delete his comment. NEVER BE RUDE TO YOUR CUSTOMERS!!!!!!
@Ragesh,
You should better ask Mr. Nibir not to waste presious time buying components from local markets(some time you don’t get exact components) and then soldering all by hand and then pulling the hair coz it do not work !
On the other hand getting a assembled and tested board cost little more as those are made by cheap labours!
Last week I encountered a Ph.D. soldering a simple avr board. And then telling that the pcb had errors !!! How come a PCB that is used by atleast 500 user be defective???
The reason was a incomopitable push button that not only brock the beauty of the board but also obstucted the gnd suuply to mcu.
He spent 15min talking to me over phone that must have cost min rs 15. That is the cost we pay to the soldering guy at our assembly line!
the moral of the story
take wise decision, don’t pull hair, if you can see the pot hole avoid it! Save your time. Give back to the community (or don’t take from it)
@ Mr Nibir, when ur a beginner you can better go for such easy to use kits..once u get experienced you ll not have such problems..!
and at @avinash: sorry i dint knw the entire story!
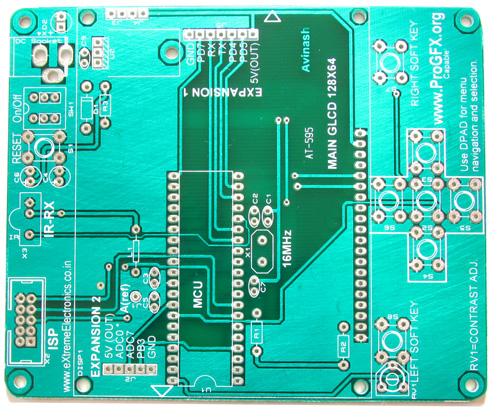
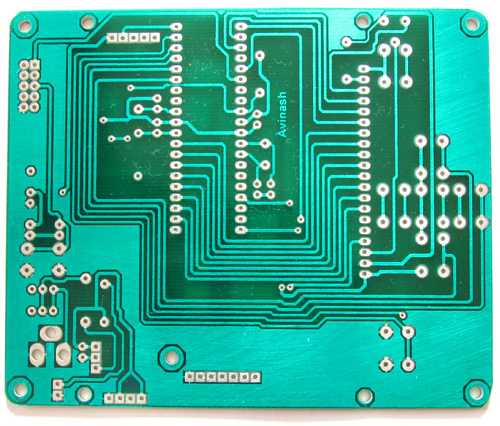
Dear Mr. Ragesh, I really don’t consider myself as a beginer. I could have made my own circuit, as I am not using Mr. Avinash’s glcd library. I just wanted to make the kit same as the existing one (Mr. Avinash’s kit), that’s why I asked for the swithes connection details. And money really matters for me, so I am forced to spend my precious time for maual jobs like pcb fabrication and soldering. And once I design a pcb board myself, I don’t pull hair, because I know the working principle behind it. Anyway, thanks to Mr. Avinash for putting those snaps of the board in his website. I have got the connection details from the images.
@avinash : with ur RFID reader i have come up with a new project can i share it with you???
i have done it for specially challenged students.
its like maintaining a database for such students using RFID and atmega32
@nibir,
cool! tats it prob solved ! chill dude happy programming..! u knw somethn without getting a help breaking our head and getting things work gives full happiness and thats called RESEARCH! we ppl at times lag in it..we need immediate and instant ready made solution for problem..!
If you are NOT using my library then why are you asking about simple switch connection ??? Do it your self too.
The thing is that two people have different ways of solving a single problem or two different views on the same topic. Both of them may be correct on their own way. But they are incompatible. In this case it is me and Mr. Nibir, our view don’t match. So we cannot talk politely for long (as requested by Mr. Ragesh).
Dear Mr. Nibir,
Since you are very experienced in this field(Or you really don’t consider yourself as a beginner), why do you need dpad connection.As DPAD is collection of some micro switches and connection of micro switch to microcontroller is easy for experienced one.Since you are not using Avinash’s library,you can use your own connection for microswitch to any I/O pin of microcontroller.It will depend upon your programming.
If you want to do circuit really like avinash kit then follow all website deeply.Because He really works hard to make the tutorial and mention each and everything.It is also easy to understand for beginner.The DPAD connection is also avilable in his website.follow this link….
http://store.extremeelectronics.co.in/images/D/GLCDBoardBlockDiagram.gif
you can see the DPAD connection to ATMega32 is as follows
UP->PA2
DN->PA3
LT->PA4
RT->PA5
It’s better to not? speak and be considered as an idiot, than speak and dispel any doubts
It’s better to not? speak and be considered as an idiot, than speak and dispel any doubts
Mr. Avinash,
Can I buy only the GLCD Development board without GLCD. Because, I already have a GLCD.
Can I interface SIM 300 and RFID Reader to this board along with GLCD at the same time?
It would be helpful if you could reply.
Thank you.
@Sandesh ! No !
Answer is YES.
But please don’t ask me how.