
Buy xBoard NOW !
Free shipping across India ! Pay Cash on Delivery ! 15 Days Money Back!
Just what is a microcontroller?
To get you understand quickly I define a microcontroller as a single chip computer. Yes it is a full blown computer in its own. It has a C.P.U., RAM, some amount of EEPROM (for secondary storage i.e. permanent storage without power), many on-chip peripherals(Timer,Serial communication, Analogue to Digital converters etc.). If you don’t understand, no problem I will be dealing them in detail in next tutorials.
But compared to a P.C. their resources(RAM,speed etc)are less. But that is what is required ! Because P.C. is a general purpose computer, which means it can run thousands of different software that are available for specific needs. Like it can run a game. The same P.C. can run this browser in which you are reading this! It can run a custom solution for banks,railways and airways. It can run a 3D modeling, video editing & image editing software for a production company. Many of these are huge software,requiring lots of memory and CPU power. And a P.C. can run simultaneously many of these ! So to run them the host computer should have enough RAM and CPU power so that it can run heaviest of them.
But in case of a microcontroller(aka MCU) which is used for a specific purpose like switching a Microwave oven heating off after a preset time, and also turn it off when temperature exceed preset value.
 |
A Typical MCU based solution. |
| |
 |
Block diagram |
| |
This design also involve controlling few indicator L.E.D. , 2 or 3 seven segment display, few switches and a relay controlling the oven. This doesn’t need a monster with 3.2 GHz Intel Core 2 Quad extreme processor with 2 GB Dual channel DDR3 RAM, 320 GB HDD and Dedicated nVIDIA GEFORCE graphics !. What is of main concern is cost and size. What it will be running through out it’s life is a simple program that is hardly more than 4KB in size, requiring less than 128 Bytes of RAM to store few variables and optionally a few bytes to store permanently the temperature and time set on last use so that it can read those on startup. Other examples where MCUs are used …
- Pen drives(for controlling the communication between P.C. and Flash Chip and also the small LED!)
- Hard disks( again for the same purpose)
- Mouse(Reads and Interprets the Sensors and send final result to P.C.),Keyboards
- Printers : Ever opened a printer for installing ink cartridge ? Then you must have seen the printed head. There are motors to control the print head and the paper movement. Your P.C. is not directly connected to them but their is built in MCU inside the printer control all these. Your P.C. just sends the data(pixels) through the communication line(USB or parallel).But the MCU used here is fairly fast and has lots of RAM.
- Automobiles.
- Calculators,Electronic wending machines, Electronic weighing scales, Phones(digital with LCD and phone book)
- Cell phones.
- Robots.
- Any thing that is small, but has great functions and is cheap !
They are every where !
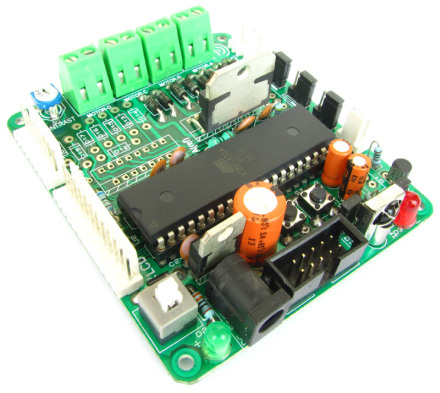
A Simple MCU based system.
A simplest MCU system may look like below
 |
The program it is executing is like this( In C language).The MCU contains a flash memory where it stores its program(its like a hard disk to it). The flash memory can be easily erased and a new program can burned. This makes them very flexible. MCUs can be programmed few thousand times before they die. |
A Simple MCU Based System |
A Sample Program |
|
Microcontroller’s PORTs
 |
A MCU has some ports. Ports are PINs on the MCU that can be turned on and off by program. By on I mean 5V and off means 0V or GND. This behavior is for OUTPUT mode. They can also be put in INPUT mode. In INPUT mode they can read what is the signal level on them (only on and off). If voltage is more than a threshold voltage(usually half the supply) it is reported as ON(1) otherwise OFF(0). This is how MCU control everything . Majority of the PINs of a MCU are PORT so you can hookup lots of gizmos to it ! They are named PORTA,PORTB,PORTC,PORTD etc. They are of one byte length, which means 8 Bits. All bits of them are connected to external pins and are available outside the chip. In smaller chips only some of the eight bits are available. For example the image shows the PORTB and it bit numbering. Setting PORTB=0b00000001 will set PORTB’s zeroth bit high that is 5V while remaining PINs will be low(GND). [NOTE:To write a binary number in c prefix it with 0b ex 0b00001000. It is decimal 8 not 1000 !] The program above is not complete program, it is just a pseudo-code. So it won’t compile. Also you may be wondering where it will be entered, compiled and how the heck it will pushed into that chip? They are the subject of next tutorials and I will be covering them in detail. |
What the program does
STEP 1 SetPortDirection(); This Function Makes the PORTB as OUTPUT. Its implementation detail is not shown.
STEP 2 PORTB=0b00000001; makes the 0th bit high, switching off the L.E.D. because other end of LED is connected to VCC(i.e. Supply voltage 5V)
STEP 3 Delay(0.5); Halts the MCU for 0.5 Sec.
STEP 4 PORTB=0b00000000; Switches on the LED
STEP 5 Delay(0.5);
STEP 2 to 5 are within an infinite while loop so it runs till MCU is powered. The program is compiled, and burned into the chip and power is turned on and woillaaaa that LED is blinking once every second. You have just understood the “HELLO WORLD” program for MCU empire. Although the given program doesn’t do something very important and can be done without a MCU and in a cheap manner, but it introduce you to microcontroller programming.
Doing this with MCU has some advantages also. You can change the way LED blinks by simply writing a new program without touching the hardware part. You can also connect 8 LEDs to all 8 PINs of the PORTB, write a nice program to light them in various pattern and you have a deluxe decorating lights ! Which you can’t make easily without MCUs.
So you have seen that major functioning of a MCU project are made in software and hardware part is simple and small. Now you have learned the basics of MCUs and their use. Hope you have nice time reading.
By
Avinash Gupta
Facebook,
Follow on Twitter.
www.AvinashGupta.com
gmail@avinashgupta.com
since i could only found the part I instruction, i wanted to read more of the microcontroller. I also wanted to know weather i would be able to order this “xboard mini” from here itself. I live in West Bengal, Siliguri and have completed basic electronics and am interested in learnig Digital electronics as a hobby, so i would be really thankful if you would help me in this. If i will be able to order this product i would also like to know about how much money i have to pay to get the product. I have read that the board including all the accessories the cd, adaptor, etc the rate is given as 450/-. Please do reply in my mail. I would be highly obliged. My Cell No:- XXXXXXXXXX [Hidden Due to privacy reasons]
Hi Dipendra
Whole series of tutorials on AVR programming is available here
https://extremeelectronics.co.in/avr-tutorials
The list is growing …
Be the part of it.
To buy xBoard MINI use the online shopping cart.
http://shop.extremeelectronics.co.in/
You can pay by deposition cash or cheque at any SBI Branch near you for more info see
http://shop.extremeelectronics.co.in/shipping.php
If you have any problem using online shopping cart simply mail sales dept sales@eXtremeElectronics.co.in you complete address and orders. Then after depositing amount call me and we will dispatch same day.
Thnx Sir… Those sites are really amazing!! I am totally impressed..
Pingback: Tutorial 0 - Getting Started with Microchip PIC Microcontrollers. | eXtreme Electronics
gud one…really a gud stop for beginners..!!!
It is really a nice start for beginners..
Pingback: AVR Project – Relay Timer with ATmega8 AVR MCU | eXtreme Electronics
Thank you very much for this robust intro to microcontrollers. I’ve been searching for a tutorial like this which I found customized for beginners…Thank you very much..:)
Pingback: Interfacing Ultrasonic Rangefinder with AVR MCUs | eXtreme Electronics
its really good for beginners
Pingback: 4x3 4x4 Matrix Keypad Interface with Atmel AVR Microcontrollers | eXtreme Electronics
Good Job!
It is very good introduction for beginners like me.
great job….
really good for a beginner
It is very good introduction for beginners like me.
Dear Avinash,
thank you so much for your tremendous work. Extremely useful stuff! I really cannot say how much I appreciate it…
Thanks again!
@Peter,
Thank you too ! I am pleased to have readers like you.
informative 🙂
Thanks a lot,i hope this the first time I have got what I wanted for a beginner like me:):)
nice intro …
i am a begineer studing in college . i am looking forward to your wonderful tutorial
awesome xperince!!its really intresting…
Thanks a lot it’s a very good article to help beginners like me !!!
wow…….very fascinating stuff have been published…..
I owe u to thank very much for this endeavor….keep it goin..
good luck…..!
awesome—-” bt can u gve some code in c to destroy mother board nd sumthng distructable——-”
plz help me out—-
good introduction ,i would like to get the entire tutorials.thanks
Hi,
Avinash….
your tutorials are simple and very much informative…
Great work..
Avinash
Just started reading your tutorials and it looks like lots of good basic information. I was wondering why you use PORTA in your sample program , but your discussion is always using PORTB ?
hey avinash,
started reading ur tutorials….i really love dem a lott…i hav some queries…hope u solve dem fo me..
Given: SetPortDirection(); This Function Makes the PORTB as OUTPUT.Its implementation detail is not shown.
(how does this make PORT B as output when nthing is mentioned abt PORT B in the input setportdirection();..?)
Given: PORTB=0b00000001; makes the 0th bit high(how does this happen?…is it bcoz the binary value is 1?..if so..how is dis understood by compiler..? ) switching off the L.E.D. because other end of LED is connected to VCC(i.e. Supply voltage 5V)
(y will da LED be switched off wen in high position..?)
Avinash could you make a tutorial explaining the max7219 and how does a uC interact with it.
A tutorial made by you would be grate.
Thank you so much for what you have done.
@RaZVaN
Its a great Idea ! Sure will do it ! Thanks for your suggestion! 🙂
Sir !! ur tutorials are simply awesome .
first i would like thank you for your valuable tutorials .
i want to know how to make programmer for AVR micro controller . i will be gratefull if you will suggest me on this particular topics .
Thank you
🙂
buy this programmer.
http://store.extremeelectronics.co.in/USB-AVR-Programmer-v2.1.html
thnks sir really nic job 4 biginners….
Thanks very much, All your tutorials are great
why not you add Adsence or other ads on your website
thanks brothar i’m very impressd
it is useful for me
thanks a lot
This is exactly what beginners need.Thumbs up to u Avinash!!!!!!
Hi Avinash,
I want to master the practical application and design of PCB and have been doing deep search lately,found your article under googled “PIC Chip programming”.
My questions are:
??do you have downloadable pdf articles that teach in how to learn PCB Designs including PIC programming?
?? can I use C Language for every PIC programming and if not, kindly list the important languages I need to use?
I am an R & D engineer with close to 11 years in field of Computer Science, this will be an excellent added advantage and will complete every angle in my future research projects without having to lose time in searching for designers myself.
Your prompt reply will be much appreciated.
With regards,
Babu Ramalingam
We already have your xBoard(TM)MINI & USB AVR Programmer 2.0.
the problem of pin damage of the micro while replacing. so need the programmer with ZIP socket. pl. suggest and quote.