The PIC Development Board can be easily programmed INCircuit by using our eXtreme Burner – PIC, a PIC Programmer with USB Connectivity.
The firmware of a Microcontroller is normally stored in HEX files. This HEX file is generated by an assembler or a Compiler. In this section we will show you how you can transfer a HEX file from your PC to the Microcontroller.
NOTE:
|
Connect the PIC development board with the programmer using a six pin female to female cable as shown below. Power on both development board and the burner.
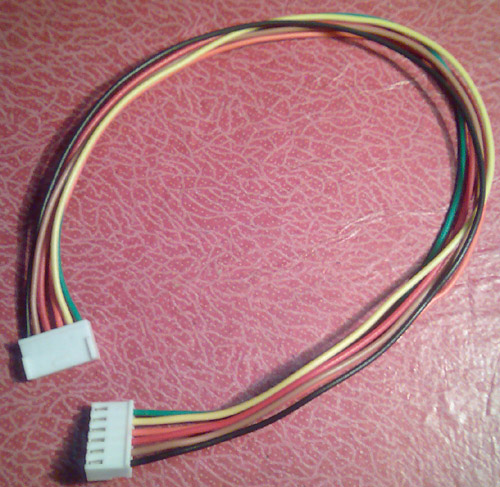 |
Fig. Six pin female to female
cable for ICSP. |
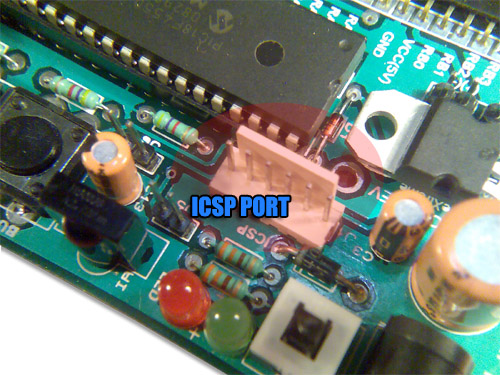 |
Fig. 6 PIN ICSP of Development
Board. |
%20.jpg) |
Fig. 6 PIN ICSP of eXtreme
Burner – PIC. |
Launch eXtreme Burner – PIC from Windows Desktop or Start Menu.
 |
|
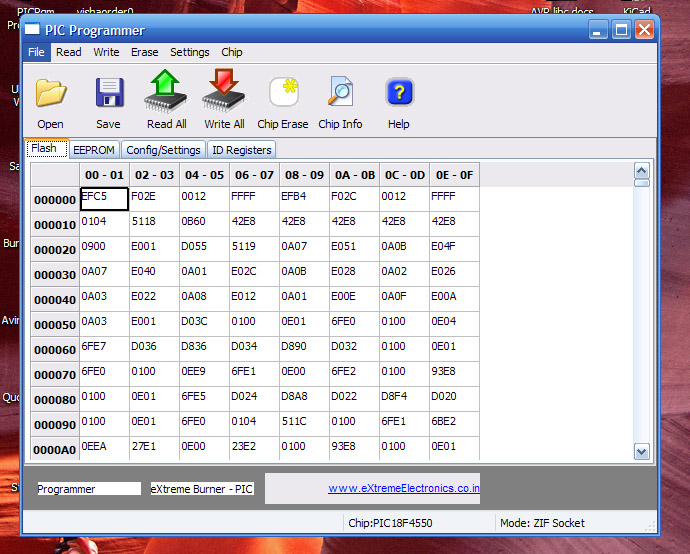
Fig.: eXtreme Burner – PIC, Main Screen. |
The software is easy to use. First you need to load the HEX file which you want to burn to the MCU. So select Open from File Menu or From the Toolbar. Then select the hex file. Now the HEX file will be loaded and the contents (FLASH,EEPROM,Chip Settings) will be available.
Now connect the programmer with your PC by using standard USB Cable and Apply power to programmer using a 12v DC adaptor. The programmer will be automatically detected by software (provided drivers are installed previously) .
After that select PIC18F4550 from Chip Menu and Programming Mode = ICSP from Settings Menu. You are now ready Burn !!!
Select Write All From Toolbar or Write Menu.
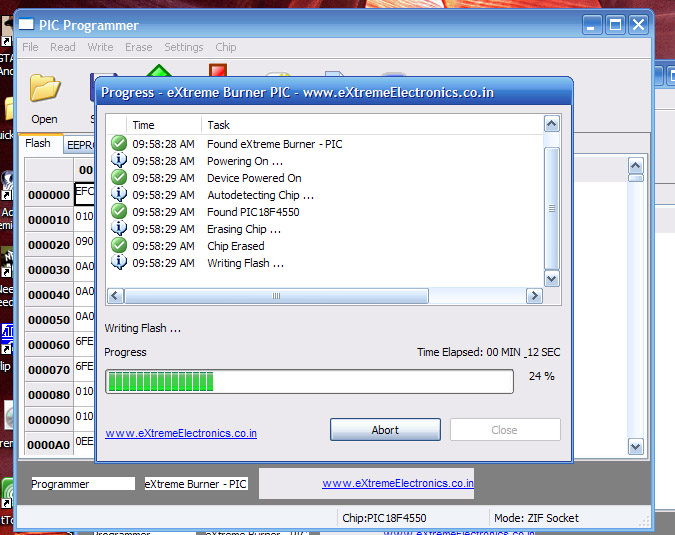
The burner will start the Burn Process. It will write each section of memory and verify that they are written correctly.
 |
|
Fig.: eXtreme Burner – PIC, Burning in Progress. |
After few seconds the process ends. The chip is now programmed with the selected HEX file contents.
Return to Help Index.
Thank you for the information…
hi i want pic18f4550 development board formycompaney
I would like to know whether your programme supports 16F877, 16F84A and other 16 pin, 40 pin PICs.
@Peter
See
http://shop.extremeelectronics.co.in/product_info.php?cPath=21&products_id=78
Supported Chip list there.
i want program for pic18f2550 interfacing with lm35 sensor
Hi,
Error I am getting is
1.EEPROM data not found
2.No chip dected in ZIF or ICSP port